Showing posts with label Die. Show all posts

Sunday, September 14, 2014

Sunday Summary Week 37

Happy Sunday Bloglanders

And I'm back to report on all the activities at HQ Hamman.

My mum is coming to visit and Wernich is flying home for the weekend. Oh, I love having both the boys nearby. Can't wait for 15 November when he will be finished with is Masters degree in Architecture and return home permanently.

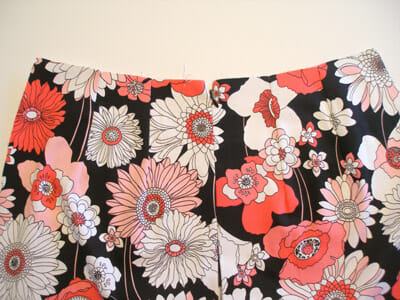
I'm still working on the metric farewell dresses and this past week I did try something new - an invisible zip!!! I used this tutorial and it works very well. If you want a hard copy, use this one.

And it should look like this once done - INVISIBLE!!


                                                                          LINK

I can't take out too many craft items while I have all these sewing on my desk as I have limited space in my Craft Closet and it scares me to think that a drop of paint or glue might land on my sewing project. BUT, I did get a bit of time to make some tags. YES, all done on the kitchen sink!!!

I used food colouring and watercolour paper. Remember the mini tags I  mass produce to keep on hand??? The initial idea was the same.

I use all my scraps and practice my stamping and die cutting on them!!!  Here is the original post.

And my food colour died ones:


I just mixed red food colouring with water and started dipping the tags. No right or wrong here.

I've got new neighbours and wanted to give something to the kiddies. I bought beautiful cupcakes and they came packed in these gorgeous boxes -  just had to add the tag.


My inspiration came from SimonSaysStamp - "Make your own Background". I do this a lot for layouts and Multi Media pages but I did want to give it a go on tags. Another "try something new" for me!

And I made some plans for Halloween treats.  This year, I'm going to make the bats that I found on Pinterest.


I'll add my own twist to it - they are going to be TINY (not more than 2 inches) for mini Chocolate bars and to save on time (and work space in the CC) - I'm going to cut them with my Silhouette. I will show once it has been done.

In the meantime, I made a collage of some of my past Halloween treats.  Even though we don't celebrate this holiday down under in Sunny SA, I just can't help joining in the fun. Love the black and orange.

                          LINK                                     LINK                                              LINK

It's Sunday and a beautiful spring day. I'm off to spend some time outside in my garden. Think I'll take my notebook with and start planning my new bedroom's blinds.  It's FINALLY finished and we will be moving once the blinds are up. Busy, busy week ahead @ HQ Hamman.

Thanks for looking at my blog today and have a WONDERFUL week. Remember - try something new - TODAY!


Thursday, June 5, 2014

Use what you've got!!

Hello Bloglanders

It's very, very cold down under in Sunny SA.  We don't get snow - at least only on the very highest of mountains BUT currently it's COLD.  My hands (and brain) seems to be frozen, my house is a mess and we are going nowhere slowly to say the least!

SO, I decided to keep busy. Out came my good old Cuttlebug and some dies. The ones in the picture is from Amy Tangerine's Plus One range and the small ones are from MFT.  And no ordinary paper for me this time round ............................................


Cork, wood veneer, corrugated carton and craft foam. And now I have this:


Everything went according to plan except for the cork that tore quite easily especially with the camera shape. Solution: I added adhesive backing from Sizzix before cutting. Worked like a charm and now I have self adhesive embellishments - ready to go! And I couldn't wait to try them out on a Project Life layout:


And some cards:
I do love the black craft foam best, don't you? Left top I have red corrugated carton and black craft foam. Bottom left - cork and red corrugated carton. Top right is the cherry wood veneer and the bottom one the black craft foam again. I didn't add sentiments as I use these cards for greetings but also as part of PL. When I want to mail one off, I just mount it and add a sentiment. I do keep a box of pre cut cards ready to e use when needed.

This was SO worth my while.  Since I got my Silhouette, I didn't utilize my Cuttlebug at all but I still love it and it's great to use up scraps.

That's it!! I'm off to have a warm cup of coffee.  Think I'll look through my die stash and keep cutting while everything is out. 

Thanks for looking at my blog today. I'll be back. Have fun and remember to try something new today.

Ps. For those of you wondering - I liked the OXOX more than XOXO so I kept it like that - IMPERFECT ME!!!


Thursday, July 25, 2013

Cut your own stamps with dies

Good morning Bloglanders

Sometimes I just wish that I can have more stamps.  BUT they are expensive and I try not to buy everything on the market. So I came up with the idea to use my dies to cut some more stamps!  And this is what I made with my homemade stamp:

Yes! Another friendship notebook!! And this is what I did: 

I wanted a branch to stamp onto my notebook and used this die to cut a stamp from yellow funky foam.


Some spray adhesive to attach the branch to my stamp block:

Ink:

A few fabric letters, flowers, some embroidery and French knots with twine from The Twinery:

Easy as that!  I have filed all my new homemade stamps in Ziploc bags and you will surely see them again. I love the little bird and the birdcage!

The notebook?  I have mailed it off as a thank-you-gift to a dear friend.  Tomorrow I'll show how I've wrapped it.  Thanks for looking at my blog and please come back to play.