Thursday, October 31, 2013

BOO BOO BOO!!!

Hallo Bloglanders

Before my final BOO - Thanks so much for looking at my bloggie this month. I had a Bumper Blog month!! A 95% increase in visits.  Maybe that's not much for you but as my blog already exceeded ALL my expectations this year - it's HUGE!!!

For those of you wondering, my spinach gnocchi is still not perfect but as I decided upon a Halloween picnic and it's pouring in Sunny SA - the gnocchi will get another chance tonight.  I think the green "pillows" will fit perfectly with my black, orange and green theme. Enough of that!! These are my Halloween treats:

 I actually wanted to do the bat version but then I ran out of time and as I've seen them in the Silhouette gallery, I didn't want to be a copy cat. So I reverted back to miniature pillow boxes and spider silhouettes.  I used the same shape that I've used here:

This time I used leftover scraps of black paper to die cut with my Silhouette. You can see - one of the spiders have white legs - that is where I tried some Guesso on the black paper (recycling at its best). Actually, that is my fave one - looks authentic!! The pillow boxes are really small. I halved the original shape and a treat size chokkie JUST fits in there.

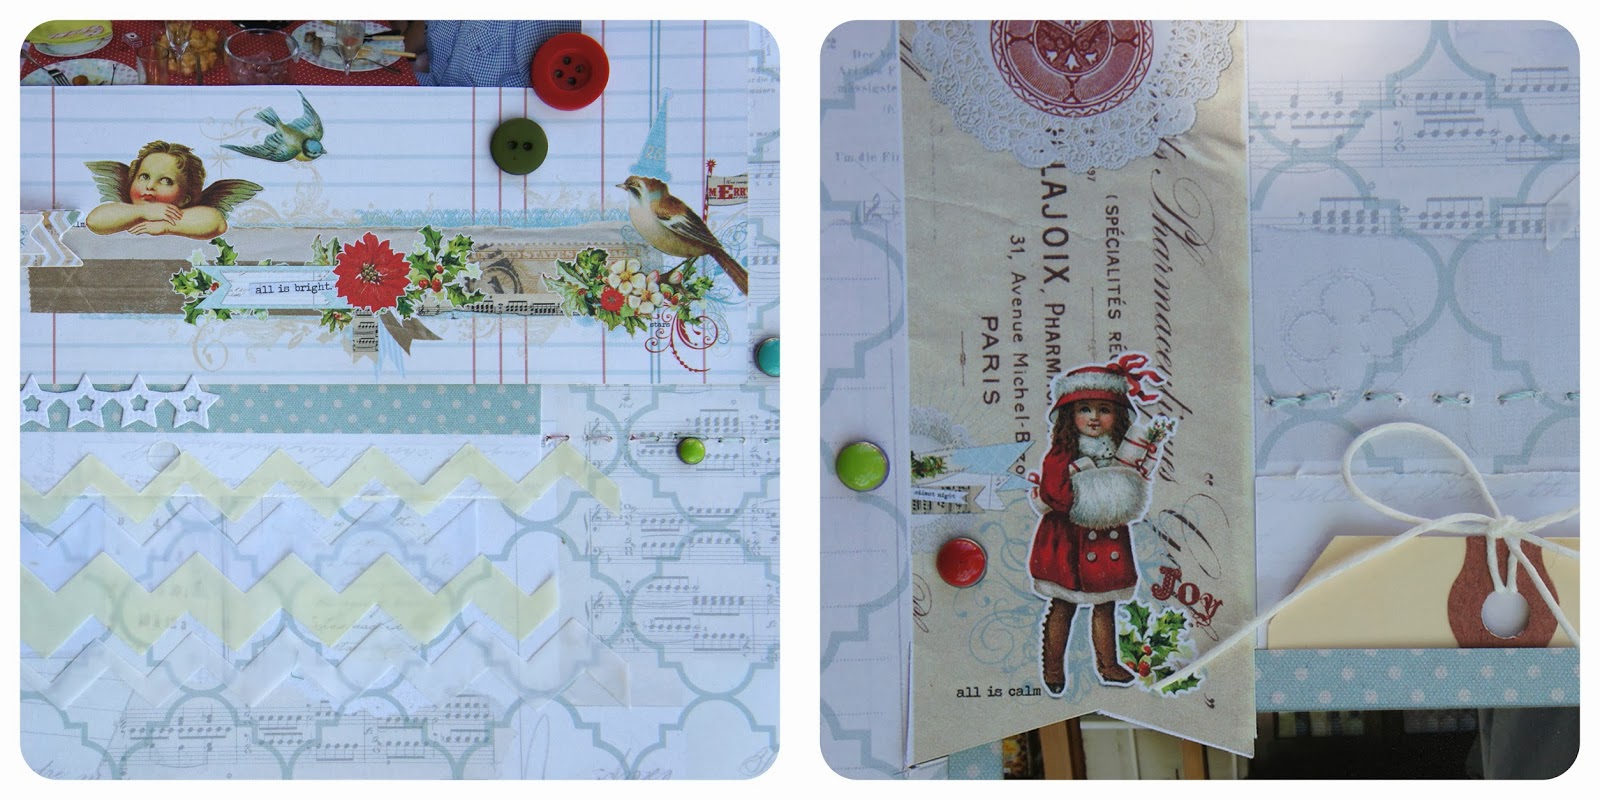
An this one was sent by special delivery (Wynand) to my Robertson friend:
A stamped die cut, a paint sample converted into a tag, some stitching and a glassine bag from Monika's "I love it all" Etsy shop. I've been converting my scraps into more usable items and of course, I included some for my friend to use over the holidays.  I'll share that with you tomorrow. You know me - re use, recycle and repurpose!

That's it!! I'm off to try my hand at that elusive perfect Spinach Gnocchi.  Have a BOOtiful day!!

Hazel


Tuesday, October 29, 2013

Christmas Layout with MME

Hallo Bloglanders

No, I haven't lost it.  It IS a Christmas layout and I did it over the weekend.  My first priority is to LIVE and only then will I have memories to preserve. So, every year over the holiday season I tend to insert pictures into my album without scrapping is. Should I have a piece of cardstock or embellishments that I want to use on the layout, I'll include it / insert a reminder note and then ...................................... 10 months later, I discover it and YOU get to see a Christmas layout in October!!

Here it is:

My inspiration came for this sketch  from MME:


And while searching for a suitable photo, I saw this unscrapped Christmas pic with all the paper and embellishments already in my stash and included in the page protector. What can be easier??  It took me less than 20 minutes to do the whole thing.

And here you can see a close-up:
I added a few zig-zags cut from white and cream Vellum to add texture to my page.  The rest all came from MME's "All is Bright" range. Best part .................................. another project done and dusted and it was GREAT reliving Christmas Eve 2012. Hop over to the MME blog to see the rest of the entries. Just click here.

That's it!  I'm off to try my hand at homemade spinach gnocchi. My husband is away on a business trip and as he totally hates spinach I decided to treat myself. Check back to see how it turned out.

Thanks for looking at my blog today. Have a Terrific Tuesday and please come back to play.

Hazel


Sunday, October 27, 2013

BOO 4 TWO

Hallo Bloglanders

I hope you had a wonderful weekend.  We did. Friends, "braai" (barbecue) outside, good wine and perfect weather.  I'm planning a Halloween picnic for Wynand and me.  And this is the lantern made out of orange vellum:


I'll be placing a solar candle inside - it really illuminates the spiders and make them look big and crawly. And some more pics:

When I did the bat for my PL mini book, I simultaneously cut the spiders from black vinyl with my Silhouette. It's so easy to stick them onto a project and the vinyl is much stronger and flexible than cardstock. I used twine from The Twinery to suspend them from the top of my lantern.The orange vellum was folded around a vase and glued at the back.After Halloween I'm going to cut it open again and use it as a background for my picnic layout.  You know me - reuse, recycle and re purpose.

And the spider eyes?? I wanted those googly ones but as my nearest craft shop that stocks them, is 30 kilometers away, I used what I had on hand. Leftover alpha stickers!!


And I'm ready for my BOO picnic 4 TWO. I'm submitting my project for The Twinery's BOO TO YOU challenge.  If you want to join in the fun, just click here.


Thanks for looking at my blog today.  Have a Marvellous Monday and please check back as I have lots more to share right here on Play as U Go.

Hazel

Friday, October 25, 2013

Project Life Mini Album #3

Hallo Bloglanders

And I'm back to show another version of my PL Mini Albums.  This one is the same concept as #1 but for this one I've recycled items - an old wage envelope, some paint samples, die cuts from other projects and notebook paper. Here it is:

 And this is how I stacked it before stitching the elements together:

 
And this time I added arrows to show you where the stitching should go:


If you missed the one I did with my Silhouette, just scroll down or click here. I really love these mini books. It gives the Project Life pages some dimension while adding more journaling and picture space.
 
And finally, it's weekend!!! I'll upload my BOO 4 TWO project over the weekend.  It's done and ready for my Halloween picnic party. But, that's a story for another day. Thanks for looking at my blog today and please come back to play. Have a great weekend and ........................... try something new!
 
Hazel


Wednesday, October 23, 2013

Mini Album for Project Life #2

Hallo Bloglanders

And I'm back to show my Mini Album for PL al la IMPERFECT ME. Here it is. And yes, I found my memory card. As it is black and was lying on a pile of  folded black laundry (why on earth would it be there??) ............. I just didn't see it!  This is version #2. If you missed #1 just scroll down or click here.

And included in my PL page:
It actually all started with an idea from Big Picture Classes - Use signage. Well, I don't have any children at home and Wynand absolutely refused to hold up a chalkboard so I decided to use what I've got.  The layout is all about a camping trip to Guano Cave near Montagu.  As I didn't take a pic of the nameboard, I decided to use the logo on my information sheet. I scanned it, "cut and lift" in Silhouette Studio and then cut it out of Vinyl. I received some as part of another Silhouette item that I've bought and it has been staring at me for the past month.  

For you "Silhouettees" out there - I did struggle. My machine did not want to feed the vinyl and I ended up sticking it to a cutting mat.  Then I couldn't get it to transfer onto the transfer sheet.  I ended up putting letters on like old times - sticker sheets!! Well, it's not perfect but I'm fine with how it turned out.  You bet I'll be watching the tutorial again - must be doing something wrong. Anyone up for some advice?? Leave me a comment, PLEASE.

And this is how the mini book works:
Cut pages for the inside. About 3. A tiny bit smaller than 8 x 6.  (I recycled some ordinary copy paper from the office) For the cover cut one 8 x 6.  Fold everything in half, punch two holes on the spine of your book, use some twine / stitching to bind and add to the outside and inside what you like. I did cut my back cover a bit shorter at the bottom as I wanted it to fit perfectly into the 6 x 4 pocket.  Just slip the back cover into the page protector slot and the rest stays on top. It gives my layout a lot of dimension, extra space for journaling and I even added some stickers and more pictures to the inside.

That's it. Another page in my life recorded!  I love my stuff!! 

Thanks for looking at my blog today. I love my daily chats with you and please come back to play as I'll be showing my #3 mini album for PL tomorrow - the non Silhouette version.

Have a Wonderful Wednesday!

Hazel

News from Craft Storage Ideas

Hi Bloglanders

For those of you who missed out on yesterday's Project Life Mini Album - just scroll down.  And .......................... IMPERFECT ME am still looking for that elusive memory card!!

I just want to remind you that there is a FAB review of the Scrap Rack over at Craft Storage Ideas.  Don't know what it is????? Let me give you a peek:


 "All will be revealed" but not only that - you will also see a very, very well organized multi functional craft space. Nothing more from me. Just click here.

I'll be back later today!

Hazel

PS. Remember to leave a comment at Craft Storage Ideas to be eligible for the $150 gift card!!

Tuesday, October 22, 2013

Mini Album for Project Life # 1

Hallo Bloglanders

I hope you are having a wonderful day!  Today I brought my most recent mini album to show. Ta da!!

And what makes this one different from the rest??? Let me give you a hint:

YES!!! It fits into my Project Life album! I love lots and lots and lots of pictures and I don't do weeks (I do LIFE) - just try to group pictures together, some journaling, a date and a title. I do end up with my pictures not fitting onto a single page so I invented the IMPERFECT ME mini album that fits into a PL album. My inspiration for this one came from the Silhouette blog.  Of course they didn't think about fitting it to PL - I did that all by myself  but they did put up a tutorial and a special bundle with shapes.  Hop over and see for yourself. Just click here.

I did cut the shapes to line up on the left with my little knife tool in Silhouette Studio but the rest was pretty much like the tutorial.  I do love the tags so I included 2.  And guess what the Silhouette challenge for the week is - tags!! Great minds think alike.

Something else, it seems that if Silhouette has a bundle for sale and you already own some of the images you get even further discount.  It's spooky .......................... Silhouette Studio seems to do all the thinking on your behalf!

OK, let me explain how I adapted the inspiration. Here are some more pics:
I lined all my pages up to the left on a 6x4.5 (this half is the important part) piece of cardstock and stitched through them leaving the top half inch open. Then I added another piece of 6x4.5 to the back and the doily (this is optional but I like it as it covers the top stitching) More stitching and the book is done. Now you slip it into your PL page protector - the back 6x4.5 piece goes into the pocket and the rest on top.

It is perfect for IMPERFECT ME - the page now has lots of dimension and more journaling and pictures can be added. I will be showing more of these PL mini albums as this is actually the 6th one that I've "designed" - all variations on the same idea but "different". I will add a sneak peak of  the one that will be up tomorrow but IMPERFECT ME lost my camera's memory card so you'll have to come back!!

Lost but now found. Look below for the PS.

Also, on Thursday I'll show more detailed pictures of the stacking and stitching if you are not sure about that. The Thursday edition was made with recycled envelopes, tags and die cuts - especially for my non Silhouette Bloglanders. You see, I've got you all covered!  Thanks for looking at my blog and please check back as I have lots more to share right here.Have a great day and .......................... try something new!

Hazel

PS. My mini PL album that will be on the blog later today.


Monday, October 21, 2013

Time for a Layout

Hi there Bloglanders

And it's time for a Layout.  The challenge from Big Picture Classes were to use a piece of bold, patterned paper and multiple pictures.  I love using lots of pictures but normally I try to keep my background as neutral as possible.  But, you know me ............................... I'm always up for a challenge. Here it is:

Just to prove my point, I'm showing a picture of my BOLD paper as well.  See what I mean? Just to let you know that I don't buy things that I don't like / use. This  came from a kit that I received as a freebie months ago and it was destined for my purge pile. When the challenge came up, I retrieved it and now it's got a second lease on life.  To tell you the truth - this is SO not me but I love how it turned out and I actually feel that the boldness makes the pictures pop.

Maybe you should scroll through your purge pile as well - nothing as rewording as trying something new and if it turns out fine, it's a win win combo for all.

That's it. Have a Marvellous Monday and thanks for looking at my blog. I'll be back tomorrow with my latest mini album invention. Please check back as I'm rather chuffed with my idea.

Hazel

Sunday, October 20, 2013

And my Faves ....................

Good morning Bloglanders

It's Sunday in Sunny SA and I'm trying to get the creative juices flowing.  I've watered down my Pic Picture classes to one layout a week.  I know, it's not supposed to work like that BUT I have to keep up with the rest of my life as well. I'll share the one I've done in tomorrow's post.

A while ago I showed you the Blog posts that you loved most and today I'm sharing my own Faves.  This one is SO totally my #1:

2012 Christmas Wreath:


I love, love to look at last year's Christmas wreath.  To tell you the truth, I loved it so much that I didn't want to pack it away - but I did and I look forward to see it again come 1st of December. Here is the link to the original post.

#2: Take along Barn:


#3: Mixed media covered File:


I do love this covered file as well:


#4: Rolled Tote:


#5: A Jar of Worms:


There you have it - My Faves!! And I'm SO inspired - just can't wait to whip up some more projects. Thanks for looking at my blog today.  Have a wonderful week and please check back as I have lots and lots and lots more to share right here.

Hazel

Thursday, October 17, 2013

Over at Craft Storage Ideas with Project Life Storage

Hallo Bloglanders

Just a note to let you know I'm over at Craft Storage Ideas today with a lot of ideas of storing your Project Life stash. Once again most of my items are re purposed - didn't you expect that?  And not only are the ideas great for Project Life but most can be adapted to store your scrapping and card making goodies as well.

Here is a sneak peak:


Just click here to be redirected. ENJOY!! And while you are there, please leave me a comment so that I know you liked my effort.

Thanks for looking - see you tomorrow.

Hazel


Wednesday, October 16, 2013

Monochromatic with Multi Media

Good morning Bloglanders

I'm a bit behind schedule with my life - apparently it's less than 70 days until Christmas and I still have to move mountains.  I think I will think about it tomorrow ................................ Today I'm sharing a Multi Media Layout.  My inspiration came from Big Picture Classes - do a monochrome layout!


You know me and my recycling ..................... and out came my tub with stips.  I started album making in the 11.5 x 12 inch days.  That meant that every single page had to be trimmed down! And that is why I have a whole tub of stips. I've kept them to do some Multi Media projects but this is the first one I got to. 

I just selected a lot of  blue"ish" scraps, glued them onto a sheet of navy cardstock, added some stitching, paint, pictures and a few die cuts. Done.

Work in progress pictures:
And close-up:
Here you can see how I added a bit more texture to the edges.  I masked it off, used my finger to rub on some extra paint, let it dry and removed the masking tape. The branch and title were done with my Silhouette and the birds cut with a Spellbinders die. And I decided to keep my pictures colored - IMPERFECT ME likes it that way!!

That's it - I'm off to do some more stripping ................................... with my paper strips, of course! Thanks for looking at my blog today and please come back to play.

Hazel


Monday, October 14, 2013

Sunshine in a Jar

Hallo Bloglanders

Actually, it's Tuesday's post but I'm so excited that I can't wait to share My Fall Sunshine in Jars project:


First up - the jars. I don't know if the rest of  Blogland  have them but they are WONDERFUL. They have little LED lights and tiny solar panels in the lids. Energy saving, cheap safe and a great way to light up a table or outdoor space. You can see the handles in my pic - you can hang them! If you want to read more, here is the link to the manufacturer, Consol. For the lazy ones - here is what it looks like in the evening:


And the lid:


You can fill them up with flowers, decorate it and let your dreams and ideas take flight!  I decided to use fall garlands to zuss them up and they do look wonderful at night. So silly, we are having spring in Sunny SA and everyone in Blogland are having Fall challenges but I don't get sidetracked that easily.  I do love to recycle my scraps so out came some "fallish" pieces. All the Fall shapes were done with my Silhouette but for those of you who don't have one - I also did a version with my normal small circle punch.


I stitched my cut-outs onto a double strand of twine from The Twinery and ta da!!! Done.  I do make these garlands all the time.  If you missed my Valentine's edition, you can see it here. They do not only use up scraps but the can be used to decorate anything and what's best - they can be used for men as well. Always a problem for me.  Here you can see one that I've done for a "boyfriend". (Don't stress, I'm not getting divorced / cheating on Wynand .................... just a word I like to use for male friends)


What more can a guy want - freshly baked rusks in a "manly", pretty, zussed-up jar!  And how am I  storing all these garlands?  Of course, I will share with you!


I used my Silhouette to cut cardstock spools (about 2x3) and I'm just winding the garland around it. Pretty awesome isn't it.  What about packing it in a jar as well?  OK, I'm off to find another jar.

Thanks for looking at my blog today.  I hope you have a wonderful day and please come back to play.

Hazel

PS. Since I wrote this post about our South African version of solar jars, I came upon a link from Finding Home of a DIY version. In her post she shares the link to Amazon where you buy the lids and use whatever jars you have on hand. Hop over and see for yourself. Just click here.
added 8 November 2013.

Sunday, October 13, 2013

Cross stitch Brooch

Hi there Bloglanders

It's Sunday evening in Sunny SA and I'm working on my "to do lists" for the week but first I'm going to show what I made yesterday.  I bought a new magazine - Creative Ideas and was so inspired by all the tapestry projects that I decided to try my hand at it. Unfortunately I don't live near a hobby shop so I had to make do with what I had in my stash.


I love brooches and use them to zuss up all my outfits. This year I'll be giving some away as friendship gifts to my girlfriends. I used cross stitch fabric and twine from The Twinery to do the stitching. The pattern for the heart came from the Creative Ideas magazine if you want to give it a go.


I'm submitting my project for The Twinery's "in the round" challenge. Hop over there to see what the rest of Blogland did. If you are still working on your "to do lists" for the week, remember to include something creative.

Another of my brooch projects: A Birdie Brooch. If you missed out you can check it  here. And this is what it looked like:


I'm off to finish up my admin but I'll be back with some more crafting fun. Thanks for visiting my blog and please come back to play as I have lots more to share right here.

Hazel


I covered a button and glued it onto two felt circles. Some more stitching and a brooch pin to the back and it was ready to wear.

Friday, October 11, 2013

Subway art in AFRIKAANS!

Hi Bloglanders

Happy Friday to you all. Back to Big Picture and it's time for challenge #4: Use vintage fonts. I have a horrible handwriting and are quite a "fonty" but I use the ones I like and have never thought about it being vintage or not.  True to my nature I decided to use as many as possible! And this is what it looks like:


I just love subway art but they are all in English so I got into it and made one in Afrikaans that resembles my own family's values.  I'm actually going to print this in A3, frame it and hang it in my kitchen for all to see. For a first attempt at vintage fonts and subway art, I'm chuffed with my effort.  Thanks to Elizabeth and Stacy over at Big Picture - without you I would never have tried this one.

And for my non Afrikaans Bloglanders - I'm not sure everything is translated 100% but it's the best you'll get from IMPERFECT ME.

my familie = my family
is lief vir mekaar = loves one another
help ander mense = help others
luister as met hulle gepraat word = listen when spoken to
hou van diere = loves animals
leer uit hul foute want niemand is perfek nie = learn from mistakes, nobody is perfect
ruim agter hulsef op = clean up
se hulle is jammer as hulle verkeerd was = say sorry if they were wrong
help mekaar = help one another
probeer altyd positief wees = try to be positive
praat altyd die waarheid = speak the truth
is regverdig = be fair

That's it. My family values recorded!  Thanks for looking at my blog and please come back as I have lots more to share with you. Have a wonderful weekend!

Hazel

Thursday, October 10, 2013

Use ORANGE in a Layout

Good morning Bloglanders

I hope you are well. Once again, beautiful weather and I'm on my way for a walk in the park.  First, I'm sharing what I did yesterday.  Let's start at the end:


I told you that I'm doing Elizabeth Dillow's class at Big Picture and challenge #3 was to use ORANGE. Now, if you know me, you would know that I never use orange in Layouts - maybe it's because we don't have orange clothes - so normally nothing to match. The only orange I could find in my stash was a 6x4 piece of cardstock from a Project Life Kit, 1 strip in my "cut-up" bin and about half a page of patterned paper in my recycle stash - no embellishments - zilch!!

And this is what attempt #1 looked like:


Bazaar pudding at it's best!! I totally hated it so off came the patterned cardstock. And attempt #2  looked like this:


Too bland! And what would an orange layout be without orange?  So, I used my only piece of orange cardstock to re cut the title and the little people that I've used as embellishments. And now you have to scroll to the top to see what effort #3 looks like . Not something that I would normally do BUT at least I used the orange that I had and the look is 90% IMPERFECT ME. (All my embellishments with compliments from my Silhouette.)

As part of the challenge Stacy shares a layout and a video.  For this challenge, she did a layout about her son leaving home and since then I've been stuck on missing my son.  We live in the same town, I see him on a daily basis but he recently got engaged and I don't want to overstep the boundaries so I'm just missing being the #1 woman in his life. A good friend once said -" if you miss your child, call your mom".  I think I'll add that as a subtitle to my ORANGE inspired layout.

That's sorted then - one orange inspired  layout for my album and another story told and captured. That's what all is is about isn't it??? Get it recorded. I'm far behind schedule with the challenges so I'm off to start on the next one - hopefully it's not another curve ball. In the meantime, thanks for looking at my blog today. Have a Thunderous Thursday and please come back to play.

Hazel

Wednesday, October 9, 2013

Gratitude Time

Hello Bloglanders

I hope you are well. We have beautiful, summery weather and it's really wonderful to be outside. However, I make sure that I do get some crafting done as well. Every day I put something out on my craft desk and even though things sometimes get rough, I mostly get it done. Yesterday I moved everything outside and did my crafting in my beautiful garden!

We don't celebrate Halloween or Thanksgiving in Sunny SA but I try to join in the fun as I love ANY occasion.  So, every year during November I do a gratitude list / mini book or layout. Yesterday I made this:

This a gratitude banner and it's hanging above my fireplace. I used my Silhouette to print and cut little chalkboard frames with Afrikaans "gratitude words" - even made blanks.  Did you know that a white dressmaking pencil works as well as chalk and it's much easier to write with?? In between I've added little envelopes made out of all my leftover MME "the sweetest thing" papers.  Inside each envelope is mini, mini notecards. The idea is that the rest of the family fill out notes of gratitude and add more gratitude words to the banner - then everything will be converted to a layout / mini book / Project Life page. If you missed my effort last year, you can read all about it here.

Of course, twine from The Twinery (Mandarin) and the color scheme evolved around my Halloween decor.

Here is a close-up:

For my non-South African Bloglanders: Geluk = Joy; Vrede = Peace; Geloof = Faith; Hoop = Hope; Liefde = Love; Seen = Blessed. Now you know!  Any more gratitude words ex Blogland? Leave me a comment and I'll translate and add your word to my banner.

That's it from me. I've got the orange layout ex the Big Picture class challenge on my desk and today it's getting done - sort of a curveball for me. I'm not an orange person, I don't like orange (except for Halloween pumpkins) and I don't own orange embellishments. Will have to get my Silhouette to print and cut to get me out of this fix.

Thanks for looking at my blog today and please come back to play. Have a Wonderful Wednesday!

Hazel


Tuesday, October 8, 2013

Project Life Storage

Hi there Bloglanders

I hope you are having a terrific Tuesday.  I've been sorting my Project Life goodies as I'm slowly but surely converting from 12x12 to 6x6 and 6x4. I will never get to a point of not buying 12x12 as I do at least 4 layouts a month BUT I'm trying to buy them in colors and patterns that correspond with a Project Life kit.

Before I start on a kit, I do a 12x12 layout and then it becomes a PL kit - IMPERFECT ME! And this is how I organize my stuff. First up my kits that include 6x6 pages:


Here you can see the original kit packed in a 12x12 Ziplock bag. I sort everything and even cut the sticker sheets to 6x6 and everything goes into a 6x6 container. I would love to use translucent ones but I had a REAL struggle to get this size. I ended up using little "suitcases" from the kiddies corner (bottom right pic) - my husband just removed the handles. What makes this great is that I can add a 6x6 paper pack and store it with my PL kit. Bottom middle pic shows how I do the lid. A pic of the kit, a list of the goodies and then - on the back of the lid, I write notes eg. papers from another kit that I have that will match with the kit or if  I have 12x12 sheets, they go into my stash but I do make a note inside the lid that I have them.

And 6x4 kits:


Same idea but I use 6x4 photo boxes. They are really cheap and I love that they are translucent. Their lids do slip of if you stack them on their sides so I add an elastic belly band. I even decorate them!!

The sides of the boxes get labeled as well and then I keep them in plastic deep storage boxes. Here you can see them on my bookcase:


And when I do PL - I just stack them up next to my desk (on the floor on the left):

I know ................................... most Project Life goodies come in great containers but I do like to buy from different suppliers and then you end up it a lot of different shapes and sizes. Also, I hate dusting so the "plastics" work for me.  Later this month I'll be blogging over at Craft Storage Ideas about storing PL.  Once my post is live, I'll add the link to this post. So, please check back. If you missed the post where I showed my original PL stash when it just arrived, just click here.

I just have to add. Once I've used most of a kit, the rest of the goodies get filed into my general stash by color. Then, if I need a specific color embellishment, I'll just grab that box and use whatever I fancy.

That's it from me for today. Thanks for looking at my blog and please check back as I have lots more to share right here.

Have a great day!

Hazel