Friday, May 31, 2013

Here and Now May 2013

Good morning Bloglanders

I'm running around getting everything done - new month, new things to do!  We will be going on a camping holiday soon, both the boys are writing exams and Wernich will be back home for the holidays soon. He hasn't seen Jessie yet - I bet he can't wait!

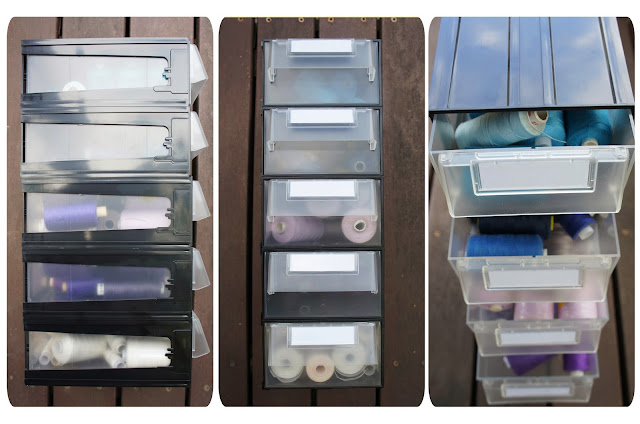
So, not a lot of time to think up new projects - I'm just trying to keep up with PL and the layouts on my craft desk.  I'll also do some more Craft Closet inside info over the weekend. If you are following, please check back.

This is the layout that I made yesterday:

Over at Monika Wright's blog she does a monthly recap of what she is doing at that time. She even supplies free printable that you can just fill out.  I wanted to do something similar but not to restrict myself to the set form.  So, as part of my PL, I journal about my family, my house & garden, work, etc on a monthly basis.  No formal rules, just the info.  This month I scribbled it down while waiting in the que for my passport to be renewed.  The idea was that I would transfer it to journaling cards or a digi layout but I didn't get to that so I decided to tear them out and add a glassine envelope where they can be stored.

I started out with a mini layout:

The inspiration for this came from the MME Sketch Challenge for May:


My Mini Layout is 6x6, I swopped the squares for stars and stitched around the edges to replace the journaling.

I've used the MME papers from the My Girl range but as I specifically bought it to make a mini book for Girlfriend #1, I didn't want to use too much of my stash.  This is what I did:


The back of my layout - I've cut away all the access paper to keep and use in my mini book. Just couldn't get myself to waste all that beautiful blue starry paper.

And a close-up of the glassine bag and the main title of my page:

And my notebook papers outside the bag:

I loved doing this layout and shortly it will be time to do my June "Here and Now". I'm a notebook kind of girl - always one at hand and it is such a waste waiting in queues - why not journal the time away.

That's if from me. Have a great weekend and thanks for looking at my blog today. Please come back to play.

Hazel
(Somehow I lost the Sunny SA!! - IMPERFECT ME)


Wednesday, May 29, 2013

My Recycled Tin Cookie Packaging

Good morning Bloglanders

After yesterday's rain, it is a perfect, sunny, autumn day down under and I would rather spend my time out of doors than in front of my computer.  I do have a lot of errands to run and some thank you gifts to deliver.  This is what I'm giving:

I got the idea at a craft fair that I visited a few years ago.  You use an ordinary, empty tin (the ones with tomato puree or sweetcorn), clean it out, make sure the edge is smooth, wrap an old book page around and doll it up with whatever you have available.  The original one that I saw even had a decorated clothes peg added to it.  If you want to add a special tag, it can just be clipped up with the peg.

Inside my tins are bags of homemade cookies and I've decorated them with flags and heart die cuts from my scrap stash. To each flag I added the type of the cookie inside. As easy as that and a lot of recycling done!

That's it.  MY RECYCLED TIN PRESSIE PACKAGING. Thanks for visiting my blog. Please come back as I've got a lot more crafting fun to share right here on Play as U Go. I'm off to enjoy the beautiful sunshine. Have a great day!


Tuesday, May 28, 2013

Nauti{cool} cards

Good morning Bloglanders

Finally it is winter in Sunny SA!  I totally love it. Jerseys, boots and soup.  My fave season.  For those of you who haven't been to Sunny SA - our winters are a bit like the European summers to me. Cold and rainy days and in between we get lots of perfect sunny days.  We don't get any snow in Stellenbosch where I live - just a teeny bit once in a blue moon on the mountain tops.

So, with our second rainy day, I decided to do a card for The Play Date Cafe to warm things up.  Who can resist this week's color combo?

Here is my take on it:

Just look at my grass!!! It is from my takeaway sushi! In real life it pops off the page - my photo taking skills (or rather lack thereof) is to blame. I've used a stamp and die set from Sizzix called Hello Spring.  Actually, I bought it because of the little birdie - he is so adorable. (and the sets were on 40% discount!) 

I'm still trying to do a set of cards or tags every week - by the end of the year I'll have 52 sets to use as Xmas and birthday pressies. Also, if I have 52 sets, I have 52 different combo's to choose from should I need to pack / wrap or write a note and there would still be 3 cards left to give away.  This works so well for me. Two years ago I mixed up all the year's remaining cards and included them in the mini packing sets that I make to give away.  Do you still remember what they look like?  Just click here to go to the post and for the lazy ones - a pic:

I do stacks of them, they cost next to nothing and my friends even ask for a refill!!

That's it from me. Thank you for looking at my blog today. Please check back as I'll have some more crafting fun to share right here on Play as U Go. Have a Terrific Tuesday!


Monday, May 27, 2013

Drawers converted to shelves - The Craft Closet

Hi there Bloglanders

I hope you are having a Marvellous Monday and that you had a lot of quality time with your loved ones over the weekend.  Today I'm sharing the drawers that I converted into shelves for my Craft Closet.

I don't have a lot of wall space in my Craft area and therefore were on the lookout for some shallow shelves for some time.  I was looking for something similar to the Recollections Craft Accessory Organizer, but couldn't find anything in Sunny SA. So, when my father's desk from days gone by got shortened to become a dressing table in my parent's flatlet, I grabbed them.

My husband added a shelf to the middle: 

And up they went. Girlfriend #2 (the interior designer) wanted them unpainted but after a week of looking at their dark and dingy form, out came my ice cream paints.  I left the front and handles unaltered and painted the insides in a mauve purple.


Now all the glass jars are on my shelves as well as my patchwork fabric stash. OH, AND my Washi tapes in a recycled chocolate holder!  I love the bright colors and I can see exactly what I have at a glance. I use these drawers at craft fairs - just take them off the wall, use and back up afterwards. As easy as that.

I'm so chuffed at how it turned out.  The best part is that I used something that would otherwise have been thrown away.  If you missed out on my Craft Closet info, just click on the small link under Play As U Go on top of my post or here and you will be redirected.

I hope you enjoyed my take on the drawer conversion. I'll be back tomorrow to share some more crafting fun right here on Play as U Go. Have a great Monday and thanks for visiting my blog.


Friday, May 24, 2013

Spring Flowers - The Twinery

Hi there Bloglanders

Today I'm taking a break from the Craft Closet posts - I will do one each week until everything has been covered and link them all up to the small button just under Play as U Go on top of my page.  Click there and you will get the links to all the related posts.  I'm just getting bored and decided to show some crafting fun today.

This is what I did:


And from above:

Over at The Twinery the challenge is:


Even though Sunny SA is heading for winter, I thought there could never be enough flowers to cheer a drab day up.  I'm actually helping two girls to make a gift for their teacher and this is what it will be.  I got the tutorial (and all the templates) here. It is called a Hexagon explosion box and inside is 3 layers of pages that can be decorated.  I forgot to take a picture of this but once the girls have decorated it, I will surely share it with you.

U used crochet flowers that I did with Pink Sorbet Twine to decorate the lid of the box.  I don't knit or crochet but I found the instructions in a magazine and it was easy enough for me to do. Lucky me inherited my grandmother's knitting and crochet needles - she would be so proud to know that I've actually used them.

That's it from me. I hope your May has a lot of  flowers in it. Have a great day and enjoy your weekend. I'll be back to share some more crafting fun right here on Play as U Go. Thanks for visiting my blog today!


Thursday, May 23, 2013

Craft Closet - A Desk with a story

Good morning Bloglanders

I hope you are having a Thunderous Thursday!  Today all will be revealed about my Craft Closet over at Craft Storage Ideas. If you want to see - please click here. As promised - today I'm sharing my "desk story".

Can you believe that I actually have two of them in my very small Craft Closet!  One for "crafting" and the other one for my sewing. Ta-da!!!

My husband originally made them as changing tables for Pieter's nursery many, many moons ago.  Then they became desks in Wynand's home office and now they they are all mine.  This is what they looked like before they got the "ice cream treatment".


What I love about my desks are that Wynand added shelves underneath. On these I keep my current sewing project as well as a craft project and my week's PL page.  When I work on them, I take it out and then it goes back - my desk stays clear of clutter and always ready for something new. Also, when I have a few moments to spare, I have something at hand to do. For me, gathering all the goodies, takes up most of my crafting time - this way I get that done first and then sit back and craft on when I get the time.

I've added a funky green arrow to show you where the shelves are:

And my pride and joy - my "desk bags".  I've made them about 5 years ago and they really, really work.  All the odd shaped items go in here as well as the ones you need to reach for while crafting but don't want on top of your desk. It is sort of sewing on the one side and paper crafting on the other. I think I'll do a desk bag tutorial some time - I used the same principal on the trolley covers that I've made. The fabric is ordinary, white sheeting - I take them off and wash them in my washing machine.  They have Velcro on top and I've put Velcro on the underside of my desk's "overhang" with a staple gun. You wouldn't believe how heavy they are. Between the desk bag and the actual desk, goes my cutting mats - I never know where to put them - perfect solution!

In these pictures you can also see that I put a cover over my craft desk.  I've used white sheeting for this as well and it works like a fitted sheet.  After having to scrub away glue from my desktop many, many times, I came upon this brilliant idea.  I have two and if they are dirty, I just wash them in the washing machine. Most glue, paint and even ink wash out and even if it sticks, I'd rather have it on the cover and not on the desk.  I've had my cover for the past 2 years and as you can see they still look relatively neat and my desktop is perfectly clean and glue free.

That's it!  Thank you for visiting my Blog and for reading my post over at Craft Storage Ideas. Please come back to play as I have lots and lots more to share right here on Play as U Go.

If you have missed some of the Craft Closet posts - there is a (small) link just under the Play as U Go logo on top of my post or you can just click here to be redirected.

Have a wonderful day! 


Wednesday, May 22, 2013

Craft Closet - Ribbon Storage

Good morning Bloglanders

I'm busy, busy, BUSY.  We are going on a camping trip (again!!) and Wynand has a lot of projects lined up for me. Let me tell you, we nearly had a divorce on our hands two days ago as I had to cover two mattresses with canvas. Honestly, I'm not going there again.  I'll take a picture so that you can have sympathy with me - once the sun is shining in Sunny SA again.

Today, I want to share my ribbon storage system with you. I can't believe that I have that much going on in a room smaller than my bathroom.  My room will be on the Craft Storage Ideas blog tomorrow so I don't want to spoil the surprise by giving up all the inside info before then. But, rest assured, it is all coming to Play as U Go very soon!

I don't buy a lot of ribbon as this can totally become an obsession.  Mostly, I do hybrid crafts - not a lot of cards for me but I love to make tags and for that you need some ribbon or twine.  I'll do the Twine storage in a later post but right now here is a pic of my ribbon storage system:


I have added the pink arrow so you can see where our water computer is located - on the wall in my Craft Closet!!! This would have been wasted space as you have to get to it easily so I used these cheap, lightweight, "spaghetti" containers. Here you can see where it is in my CC.


Everything in my craft space is arranged according to the colors of the rainbow - red, orange, yellow, green, blue, indigo, violet. Then one for naturals, black and white. I also have an unmarked one - for scraps. (Yes, I recycle packaging material as well!) This is my red, orange and yellow container:


I've "marked" the lids of the containers with some scraps of ribbon and double sided tape. I just liked the look of it but if you turn the containers with their bottoms to the front, that wouldn't even be necessary. I'm so sorry I didn' take a "before" picture of my ribbon stash.  It was a huge lot and a huge mess and after I've sorted and divided them into the spaghetti containers, they take up a lot less space, I can see what I've got at a glance and they look neat and tidy.

That's it!! Another inside view into my Craft Closet.  I'll be over at Craft Storage Ideas tomorrow to share my room BUT I'll also do a special treat for you, my Play as U Go friends - I'll show and tell all  all about my desks. Boring topic - not mine!! See U soon, have a great day.


Sunday, May 19, 2013

Crate Conversion to Trolleys

Hi there Bloglanders

My second post for the day!!  This is part of my series of posts on my Craft Closet.  The whole story will be revealed over at Craft Storage Ideas on Thursday the 23rd of May.  I'll insert the link once it is published.  If you want to get the rest of the inside info, you can check back to my previous post. (just scroll down or click here)

My inspiration for this actually came from this post that I did for Craft Storage Ideas. I had all these wooden crates that we used in the winery and decided to turn them into trolleys for my Craft Closet. This is what they look like now:

When you walk into my Craft Closet, I have 3 of them lined up against the wall on the right.  I wheel them around the house and fitted other wooden boxes and plastic tubs into their cubbies for my supplies and scraps.  Also, I made bags with pockets to cover them.  In these I put supplies that I need when I craft in the Craft Closet or elsewhere.  In this picture you can see that I've slipped magnetic sheets into the pockets and now all my Spellbinder nestability dies stick to the outside of the pockets. I can see at a glance what I have and what I want to use.

And this is what we did. Actually, I said how and my husband DID:

The "before" picture of the crate:

Wynand tied them together with cable ties and added wheels.  They are VERY sturdy and will hold a heavy die cut machine.  I wanted the cable ties as you never know - maybe they will be reincarnated into something else along the line. With IMPERFECT ME you never know.

I gave them a splash of white paint and added fabric jackets. Here you can see what the finished trolley looks like:

And the Cuttlebug plates fit into the back pockets:

When I sew, I use them lined up against the wall as I like to have an open floor and lots of space to put my pins, measuring tape, patterns and notebooks right next to my sewing machines. If I craft, they get wheeled next to my desk and I put my paper cutter or die cut machine on top.  I like to have my desk uncluttered to work on.

And another picture:

That's it. Thanks for looking at my Blog. Tomorrow I'll have to get my office work done but I'll be back with some more crafting fun just for you. Have a Marvellous Monday!


The Craft Closet

Visitors from Craft Storage Ideas - scroll down to see and get the link of my thread storage system. It is #6 and while here, look around my blog - I love visitors!! Thanks for visiting me. 

Here is the link to my original Craft Storage Ideas post.

If you are looking for the Craft Storage Ideas version. Just click here.


Hi there Bloglanders

You might think I finally lost it but I'm doing this post to try and get all the links to my Craft Closet in one post. I told you a while ago that I get to share my craft space as part of my "job" as contributor at Craft Storage Ideas.

I'm not a curious person so I can't think why you would want to see what other people do BUT a craft space - I'll look at thousands of them if I can.  My post will be up on Thursday the 23rd over at Craft Storage Ideas but I'll share with you right here on Play as U Go how and why I did everything. Once the post has run over there, I'll copy the info into this post as well.

Very, very first sneak peek into my Craft Closet:


The topics and the Links:

1. Sewing machine covers:

To see this post just click here.


2. Storage Boxes:

To see this post just click here.


3. Crate conversion to trolleys:

To see this post just click here.


4. The desks (the inside story), Desk storage bags, Desk cover.

To see this post just click here. 


5. Scrap storage.

6. Thread storage.

To see this post just click here.


7. My chair cover. (and the inside story)

8. Mood / Inspiration board.

To see this post just click here.


9. Ribbon storage.

To see this post just click here.


10. Pin & Magnetic Boards.

To see this post just click here


11. Fabric storage - old drawer revamp.

To see this post just click here


12. Converted Frames.


OK, we will add as we go! Keep checking back.


Friday, May 17, 2013

Mini Layout Jessy Baby

Good morning Bloglanders

I hope you are rested and ready for the weekend.  Time to kick up your heels and have some fun!

Today I'm sharing a Mini Layout of the newest addition to our family - Jessy. Here she is:

First the story. My "blind side son" just loves dogs and when he came to live with us more than 12 years ago his first wish was to have a dog. So he got one - Skollie. (We are "cat people") Since he moved to another university at the beginning of this year, Skollie has been living with Wernich's girlfriend and I think it was he who got her through the loneliness of the past five months. So Chandre decided to get another dog and this is our new baby - Jessy. She is totally Cute, Wonderful, Little, The Sweetest thing and Delightful! Chandre works full time and on her way to work she drops off the dogs at our place for "daycare" and in the evening they get picked up again. Like real grandchildren - just "granddogs".

Now about my layout. Since starting Project Life, I try to make more mini layouts to use as "fillers", titles and / Journaling cards on my pages and this is one of them. It is actually very therapeutic as you can make a whole layout out of scraps and the process is much quicker (and cheaper). For this one I used a recipe from a JBS and MME:


1. Combine at least two MME products to create a unique handmade embellishment
2. Focus on the journaling in a creative way
3. Get painterly!

I made all my embellishments - the banner, the name - using a LOT of different products and ranges from MME - all scraps that would otherwise be wasted.

As my Mini Layout is only 6x4 I didn't have a lot of space for journaling but I think my twist on "the sweetest thing" might just work. I think it is very original how the "DELIGHTFUL"  covers up the "by Jen Allyson".

As for painterly - my canvas was a bit small and there were already a lot going on there so I just added a paint rub to the edges to give a bit of dimension.

Here you can see my Mini Layout in my PL album:
Yes!! I should figure out how to take pictures with page protectors on but you get the idea don't you?

Thanks for joining me on my blog today. Have a great weekend and please come back to play as I have a lot more of crafting fun to share right here.  I'm off to make some business cards - no custom printed cards for the world's biggest Hybrid crafter! Check back and all will be revealed. Have a Fabulous Friday!