Showing posts with label Halloween. Show all posts

Tuesday, October 28, 2014

Take Along Art / Craft Bag - Part 2

Hallo Bloglanders

And I'm back with the second part of my Art / Craft bag.  If you missed the first part, just scroll down or click here.  Hurry and catch up - you are going to have SO much fun sewing along.

It's a great idea to slip your paintbrushes under some elastic as it keeps them right where they should be. You can even hang your bag and they will stay put!!


And this is how I did it:

Draw a line down the middle of your "Puffy" bag.  (I'll be showing how I made it tomorrow) I used pencil as the elastic is going to cover my markings.


Pin the elastic over the items you want to keep on the outside of your "Puffy Pocket".


Remove the items.


Stitch.


DONE!!!

As easy as that.  As promised, I'll be back tomorrow with the "Puffy Pocket"  Thanks for sewing with me today.

And for my non sewing friends I brought some more Halloween inspiration.  Just click on the links beneath the pictures and you will be redirected to the post that explains how I did it.


                  LINK                                              LINK                                            LINK
        Haunted House Bag                           BOO Babes                                 Spider pillow packs
  
Thanks for looking at my blog. Have fun and remember to try something new - TODAY!!


Monday, October 27, 2014

Take Along Art / Craft Bag - Part 1

Good morning Bloglanders

To all my fellow storage enthusiast coming from the Craft Storage Ideas blog - thanks for joining me this week - we will have FUN and I'll show exactly how I made my Take Along Art / Craft Bag.

This is what the finished product looks like:


Today we are going to cut and seam the open edges. Tomorrow I'll explain how I added the elastic to fit my tools, Wednesday we will do the "puffy pocket", on Thursday Velcro, straps and finishing up. On Friday I have a special surprise for you - a mini version for the kiddo's. Perfect and just in time for Xmas. Check back as there is a TWIST on this one!!

Without further ado I'll show what the finished bag should look like. The final size of the closed bag is 30 x 33 cm and about 6cm deep to accommodate the inside pockets.


NB!!! 1 inch = 2.54 cm. Therefor, if you want to measure in inches, you have to divide my measurements by 2.54. At the end of the week, I'll share a link to a printable where you will have both units.

You will need about 70cm of leftover, sturdy fabric. Mine was a 140cm wide bull denim.
40cm elastic
32 cm Velcro (1.5 cm wide)
Sturdy cardstock. (I added this as I want to use my bag for crops. Therefor, I wanted my covers to be extra sturdy not to damage my scrapbook paper. My scrapbook paper go into the "pockets" that form between the outside front and back covers)

Lets start cutting:
70 x 35 cm (Cut 2) - Front and Back
23 x 30cm - Flat Pocket
25 x 40cm - Puffy Pocket
19 x 30cm - Back Pocket
15 x 15cm (Cut 2) - Back pocket flap, Bag flap (fold in half to be 15 x 7.5cm)
10 x 10cm - Puffy Pocket flap (fold in half to be 10 x 5cm)
40 x 5cm (Cut 2) - Handles (fold in half to be 40 x 2.5cm)

Now seam all the edges that will be left open. I used a zig zag. (length 4, width 2) - the look I wanted was "rough and arty".  If you want a neater look, just fold over and stitch.

The edges that will stay open are:
Short edges of front and back
Flat pocket short edge
Puffy Pocket long edge
Back pocket long edge

Also, fold the flaps and handles in half, iron flat and sew around the open edges:

Now we are ready to start assembling.  I'll be back tomorrow to show you how. The puffy pocket is the only tricky part BUT if you follow my instructions it's easy peasy.

For my non-sewing Bloglanders, I brought some Halloween inspiration. Just follow the links below the pictures to see the inside info.

                  LINK                                           LINK                                                 LINK
       Spider Pillow Packs                           A Jar of Worms                                   Mini Pumpkins  

Thanks for joining me today. Have a Marvellous Monday and remember to try something new - TODAY!!
     

Sunday, September 14, 2014

Sunday Summary Week 37

Happy Sunday Bloglanders

And I'm back to report on all the activities at HQ Hamman.

My mum is coming to visit and Wernich is flying home for the weekend. Oh, I love having both the boys nearby. Can't wait for 15 November when he will be finished with is Masters degree in Architecture and return home permanently.

I'm still working on the metric farewell dresses and this past week I did try something new - an invisible zip!!! I used this tutorial and it works very well. If you want a hard copy, use this one.

And it should look like this once done - INVISIBLE!!


                                                                          LINK

I can't take out too many craft items while I have all these sewing on my desk as I have limited space in my Craft Closet and it scares me to think that a drop of paint or glue might land on my sewing project. BUT, I did get a bit of time to make some tags. YES, all done on the kitchen sink!!!

I used food colouring and watercolour paper. Remember the mini tags I  mass produce to keep on hand??? The initial idea was the same.

I use all my scraps and practice my stamping and die cutting on them!!!  Here is the original post.

And my food colour died ones:


I just mixed red food colouring with water and started dipping the tags. No right or wrong here.

I've got new neighbours and wanted to give something to the kiddies. I bought beautiful cupcakes and they came packed in these gorgeous boxes -  just had to add the tag.


My inspiration came from SimonSaysStamp - "Make your own Background". I do this a lot for layouts and Multi Media pages but I did want to give it a go on tags. Another "try something new" for me!

And I made some plans for Halloween treats.  This year, I'm going to make the bats that I found on Pinterest.


I'll add my own twist to it - they are going to be TINY (not more than 2 inches) for mini Chocolate bars and to save on time (and work space in the CC) - I'm going to cut them with my Silhouette. I will show once it has been done.

In the meantime, I made a collage of some of my past Halloween treats.  Even though we don't celebrate this holiday down under in Sunny SA, I just can't help joining in the fun. Love the black and orange.

                          LINK                                     LINK                                              LINK

It's Sunday and a beautiful spring day. I'm off to spend some time outside in my garden. Think I'll take my notebook with and start planning my new bedroom's blinds.  It's FINALLY finished and we will be moving once the blinds are up. Busy, busy week ahead @ HQ Hamman.

Thanks for looking at my blog today and have a WONDERFUL week. Remember - try something new - TODAY!


Thursday, October 31, 2013

BOO BOO BOO!!!

Hallo Bloglanders

Before my final BOO - Thanks so much for looking at my bloggie this month. I had a Bumper Blog month!! A 95% increase in visits.  Maybe that's not much for you but as my blog already exceeded ALL my expectations this year - it's HUGE!!!

For those of you wondering, my spinach gnocchi is still not perfect but as I decided upon a Halloween picnic and it's pouring in Sunny SA - the gnocchi will get another chance tonight.  I think the green "pillows" will fit perfectly with my black, orange and green theme. Enough of that!! These are my Halloween treats:

 I actually wanted to do the bat version but then I ran out of time and as I've seen them in the Silhouette gallery, I didn't want to be a copy cat. So I reverted back to miniature pillow boxes and spider silhouettes.  I used the same shape that I've used here:

This time I used leftover scraps of black paper to die cut with my Silhouette. You can see - one of the spiders have white legs - that is where I tried some Guesso on the black paper (recycling at its best). Actually, that is my fave one - looks authentic!! The pillow boxes are really small. I halved the original shape and a treat size chokkie JUST fits in there.

An this one was sent by special delivery (Wynand) to my Robertson friend:
A stamped die cut, a paint sample converted into a tag, some stitching and a glassine bag from Monika's "I love it all" Etsy shop. I've been converting my scraps into more usable items and of course, I included some for my friend to use over the holidays.  I'll share that with you tomorrow. You know me - re use, recycle and repurpose!

That's it!! I'm off to try my hand at that elusive perfect Spinach Gnocchi.  Have a BOOtiful day!!

Hazel


Sunday, October 27, 2013

BOO 4 TWO

Hallo Bloglanders

I hope you had a wonderful weekend.  We did. Friends, "braai" (barbecue) outside, good wine and perfect weather.  I'm planning a Halloween picnic for Wynand and me.  And this is the lantern made out of orange vellum:


I'll be placing a solar candle inside - it really illuminates the spiders and make them look big and crawly. And some more pics:

When I did the bat for my PL mini book, I simultaneously cut the spiders from black vinyl with my Silhouette. It's so easy to stick them onto a project and the vinyl is much stronger and flexible than cardstock. I used twine from The Twinery to suspend them from the top of my lantern.The orange vellum was folded around a vase and glued at the back.After Halloween I'm going to cut it open again and use it as a background for my picnic layout.  You know me - reuse, recycle and re purpose.

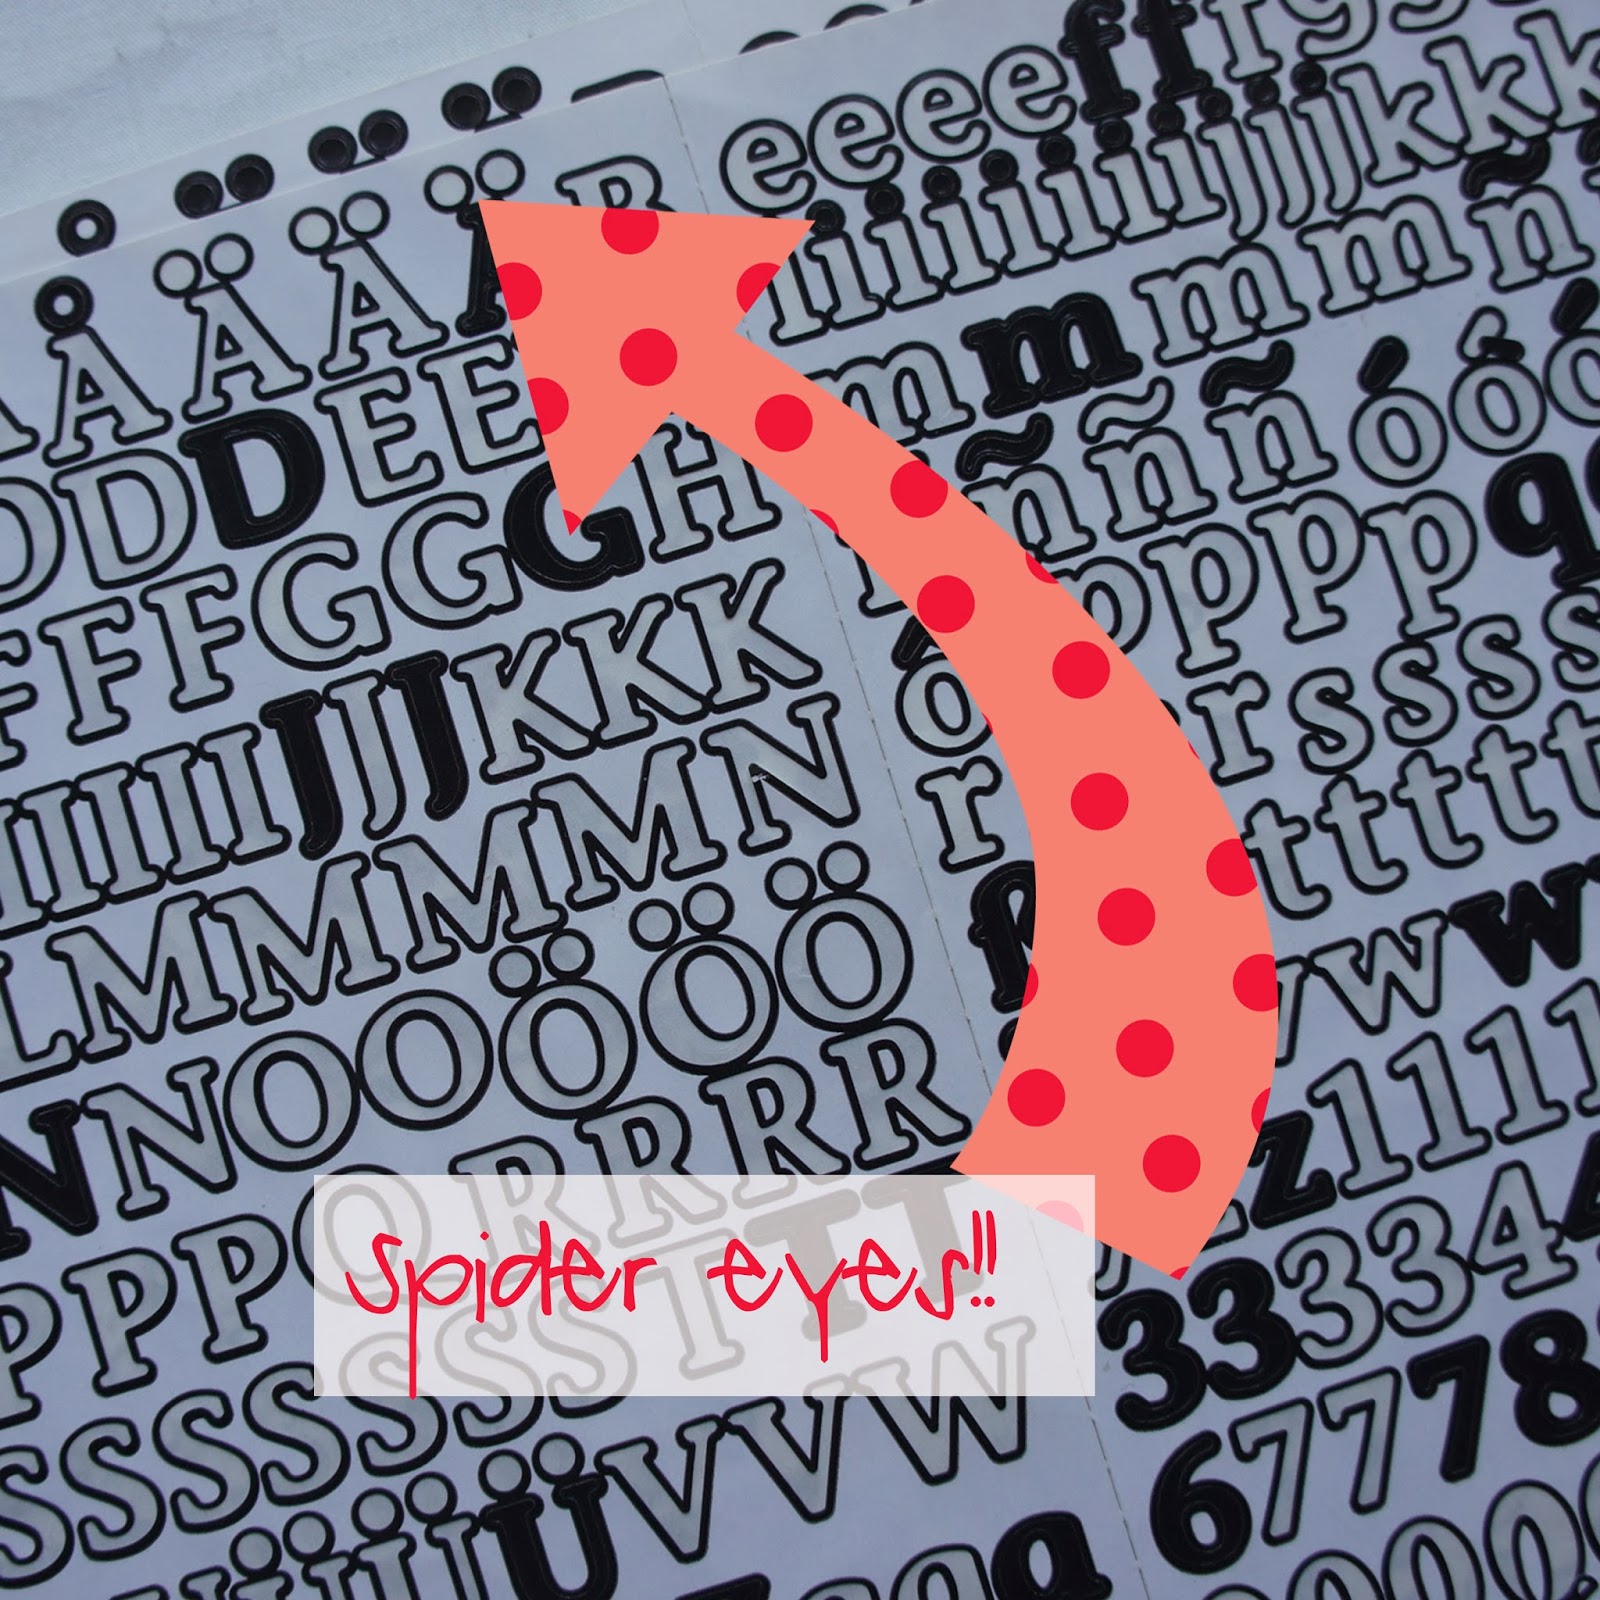
And the spider eyes?? I wanted those googly ones but as my nearest craft shop that stocks them, is 30 kilometers away, I used what I had on hand. Leftover alpha stickers!!


And I'm ready for my BOO picnic 4 TWO. I'm submitting my project for The Twinery's BOO TO YOU challenge.  If you want to join in the fun, just click here.


Thanks for looking at my blog today.  Have a Marvellous Monday and please check back as I have lots more to share right here on Play as U Go.

Hazel

Sunday, October 20, 2013

And my Faves ....................

Good morning Bloglanders

It's Sunday in Sunny SA and I'm trying to get the creative juices flowing.  I've watered down my Pic Picture classes to one layout a week.  I know, it's not supposed to work like that BUT I have to keep up with the rest of my life as well. I'll share the one I've done in tomorrow's post.

A while ago I showed you the Blog posts that you loved most and today I'm sharing my own Faves.  This one is SO totally my #1:

2012 Christmas Wreath:


I love, love to look at last year's Christmas wreath.  To tell you the truth, I loved it so much that I didn't want to pack it away - but I did and I look forward to see it again come 1st of December. Here is the link to the original post.

#2: Take along Barn:


#3: Mixed media covered File:


I do love this covered file as well:


#4: Rolled Tote:


#5: A Jar of Worms:


There you have it - My Faves!! And I'm SO inspired - just can't wait to whip up some more projects. Thanks for looking at my blog today.  Have a wonderful week and please check back as I have lots and lots and lots more to share right here.

Hazel

Thursday, September 26, 2013

Meet the BOO Babes.

Good morning Bloglanders

I hope you are well.  Today I brought my Halloween treat bags to show:

We don't do Halloween down under in Sunny SA but I love these celebrations and always try to make little treats to give away to children, family and friends.  Normally I string all the treat bags and hang it above our fireplace.  As the occasion draws nearer, I start giving / mailing away and the last few get delivered to the mailboxes on the actual day - normally the children in my neighborhood.

This year I decided to make a BOO family. In my picture you can see the little girl and boy. BOO Mum and  Dad is still in the making and so are all the nephews, nieces, uncles and aunts.  When they are done, I'll show my fireplace bunting.

And my inspiration .................................... came from the Silhouette blog's free cut file of the week. It actually began more than a week ago with a challenge. Yes, you know how I feel about that!  The challenge was to use words from the Silhouette shop in a project but as I'm Afrikaans, I don't buy English sentiments. Big Surprise when I downloaded the free Halloween shapes ........................ it included the ghost, a speech bubble and a BOO! Well, BOO is BOO - even in Afrikaans. I just love it when a plan comes together.

For the ghosts I've used tracing paper left behind from my architect son's projects.  I sized the ghost (mum is bigger and dag the biggest) and then did an internal offset in a perforated cut.  I used top stitching to sew 2 shapes together through the little perforated holes. It really works!  I added a little bow for the BOO girl and a tie for my BOO Boy. And a BOO banner - mounted on a toothpick.

I love the little BOO family.  Do you still remember the "Bag of worms" I did last year?  If BOO Babes are not your thing, check this post out here. And for the ones that don't like the "click here" - a pic!!


Whether you are a BOO person or a wiggly worm - I'm sure your treats would be adorned all round - especially if you use scraps on hand and it doesn't cost a thing. Oh, wanna know what's inside the BOO Babes?? Ghost poo!!

That's it. Thanks for looking at my blog today. Please come back to play as I have lots more to share with you right here.

Hazel

Monday, October 22, 2012

Haunted House

Hi there Bloglanders

I'm back to show you my Halloween House - couldn't wait to share!  You remember that my children are going to a Halloween party and this is for all their treats.


The colors are from The Play Date Cafe and I'm glad to share:


And the colors are:


If you want to see what the rest of Blogland did with the inspiration, just click here.

And the family:


The one with the cats is is my fave even if it is he Halloween version.  I hope you have enjoyed my take on the Haunted House. Please come back to play!

Wednesday, October 17, 2012

A Jar of Worms

Good morning Bloglanders

It's a beautiful summery day in sunny SA and I'm off for my walk around the park but first I want to share another Halloween project.  As I've said before - we don't do Halloween down under but one of the children got invited to a Halloween party. (and yes it's one of the 25 year olds) They have to dress up and bring treats.  And this is how I got to make 30 Halloween treat bags.  Here they are:


I used the scraps of vellum from Mr Architect's desk, cut them into bottle shapes, sewed two together, filled them with gummy worms, sewed shut and added the labels and twine. Don't they look lovely?

And another pic:


And a close-up:


If I may say so myself - even my pictures are getting better!  And now for my card  #41 for the 52 Card Pick-up.  Can you believe we are in week 41 already?


For this card I used a sketch from CPS for inspiration and the card is part of a set of 3.  I'll show the rest at a later stage.


I'm off for my walk. Have a fabulous Wednesday and please come back to play.


Tuesday, October 2, 2012

BOO to you too

Hi there Bloglanders

Yesterday I showed you my Halloween mini treat packs and then when I had to clear away the scraps, I thought that while everything is out, I can just as well make some decor to go above my fireplace.  And this is what it looks like:

Close-up:

I made 6 more of the treat packs, punched out some "BOO"'s, scary carts, thombstones and hung it all onto Mandarin twine from The Twinery. I even used the negative of the BOO's! All the men in my life noticed it and thought it looked great up there.  That's a first for Witch Hazel.

Now I'm ready for Hallow's Eve!

I'm working on a cover for my mini book of "words i live by".  I'll have the cover printed tomorrow and will show the finished product - in the meantime, here is a peek. (Yes, that's me peeking back)


Enjoy your day and please come back to play. I'll be right here on Play as U Go to share what I do.