Wednesday, March 12, 2014

Thank you with Easter Decor

Hallo Bloglanders

I hope you are having a happy Wednesday.  I have a few projects on my craft desk but had to do two gifts - one to thank someone and the other to welcome my new neighbours to our street. As I normally try to finish a project before I take on another (and clean up in between), I had a look at what was already out ...................... my WIP Easter décor!!

I've cut bunny shapes with my Silhouette to use for a banner, mobile, place cards and to decorate Easter egg baskets. They are in 4 "pastelly" colours and after rotating my bunny shapes in Silhouette Studio, I could fit 12 onto a single A4 sheet of cardstock. So, I just used some Bunnies to spruce up 2 potted herb plants:


Don't they look happy between all that basil, mint and parsley?  All my bunny shapes came from different sets so I opened them up in Silhouette Studio, deleted the unwanted items and resized all the bunnies. I actually moved one shape over the other and then resized until the heads were roughly the same. Just a tip:  add eyes to the original artwork - you save a lot of hassle.  I printed one set without eyes and it took me half an hour to mark the eyes and punch them with my Crop-o-Dail (IMPERFECT ME likes perfect eyes). Next batch, Silhouette cut the eyes for me. This time round they were perfect - right size, right place, no time wasted marking and punching!

I've used kebab sticks to hold the bunnies. Just split the flat end, insert and you even have a sharp side to "plant" your bunny in the pot. Easy Peasy!

That's it. I'm off to finish some more projects.  Thanks for visiting my blog. Please come back to play as I have lots more to share right here.

Hazel

Monday, March 10, 2014

Make your own "washi" with MME

Hi there Bloglanders

I hope you had a wonderful weekend. I did a lot of crafting. Still working on the farewell dress but I also managed to sneak in some Project Life layouts.  I know you don't like to look at layouts but I'll be showing as I'm rather impressed with my efforts. Seems that Project Life is growing on you and the more you do it, the nicer pages you turn out.

As part of one of my spreads I did this 6x6 mini layout. It will probably become a title page but I'm still thinking about it.


Once again I made my own washi tape.  Remember, I explained here how to do it.  At first we couldn't get washi down under in Sunny SA so I made my own but now it's readily available and we can buy it in any shape and size UNTIL ...................................... this month's MME challenge: use 3 different tapes!!!  I've been everywhere and can't find any MME tape.  Normally, we struggle to get nice goodies but never before have I come up empty handed and if I order online from the USA, it will take at least 6 weeks shipping time. Well, I'm not discouraged that easily so I decided to try my hand at making my own "MME tape".  This is how it works:


1. Get hold of some tissue paper. I recycled some from packaging material and used a powdery blue and white. Stick some double sided tape to the tissue paper.

2. Now get hold of all your MME stamps that are just screaming to be used.

3. Stamp on the tissue paper where the double sided tape is at the back.

4. Cut "tape" to the size of the double sided tape with your trimmer. Actually, scissors works much better!

5. Now you have a whole stash of different tapes to use on any project. Peel away the other side of the double sided tape and stick. No extra glue / effort needed.

As  easy as that!! I did some extra strips that will go onto my PL layout and as I said - this one will probably become a title page for one of my March weeks.  We are nearing the end of summer and shortly it will be fall - think my colour scheme will fit perfectly.

That's it. If you can't get something, don't despair, just page through your stash and think out of the box. If you want to see what the rest of Blogland did in the MME challenge, just click here to be redirected.

Have a Marvellous Monday and please come back to play.

Bye
Hazel


Friday, March 7, 2014

Save the Date

Good Friday Bloglanders

I hope you are well. I'm off to a lunch date with friends visiting from France but first, my project of the day:

Both the bride- and groom-to-be are technologically advanced. Her being a interior designer and him being a software developer. BUT .................. my dear 75+ -year-old parents!!!! No ways. So I decided to do a few "save the date" magnets to send to them and hand out to my friends who would love the smiling couple on their fridges.

Yes, they are magnetic. I've bought a pack of Silhouette printable magnet paper some time ago and couldn't wait for a project worthy of trying it out. This is it.  You can see the quality of the bigger pictures are not that good - it was printed on our normal office printer but for the smaller ones, I cut the A4 sheets to 6x4 and printed it on my photo printer.  Much better.

I used my Silhouette software to fit the pictures into the frames (Intersect function) - first time I've tried this and it works very well.

Another project done. I think I'll do some sort of a folder to fit my magnets. Don't want it to bend or fold in the mail.  Of course, I'll share, just keep checking back and all will be revealed.

Have a wonderful weekend and thanks for visiting my blog.

Hazel

Thursday, March 6, 2014

Use your Silhouette to create Custom apparel

Hello Bloglanders

Today we are crafting again .................................. enough sharing of what's happening @ Hamman HQ. I hope you are having a wonderful day - it's still really hot in sunny SA but in the evenings it gets a bit cooler. I plan to get up 2 hours earlier each day to work on the farewell dress - too warm later in the day to be covered by metres and metres of  fabric. More about the dress in another post.

Today I'm sharing a project I did for a Wynand's client who just had a baby.  Meaning that he will be 1 year old just after Christmas.  I decided to customize some shop bought T-shirts with Silhouette heat transfer:
For my non South African Bloglanders: My 1ste Kersfees = My first Christmas. It just makes a pressie extra special if you put your own twist to it. Pre Silhouette, I really didn't have the means to do this but with heat transfer, vinyl and the new stencilling options - ANYTHING IS POSSIBLE. Variety is the spice of life!

Now I have to get wrapping - any ideas?? Let me know. A gift bag is SO yesterday. Maybe I can do a canvas bag to match??????????

That's it.  I'm off to my Crafting Desk.  Thanks for looking at my blog and please check back as I have lots more to share right here. Have a Thunderous Thursday!

Hazel

Wednesday, March 5, 2014

Engagement photo shoot

Hi there Bloglanders

By now you all know that my children are getting married THIS year so I decided to take the day off from blogging and share a link to SA Weddings who featured their engagement shoot.  Even if I say so myself, they are beautiful and I love them SO much!  Just click here to see the whole article.

The photographer is Moira West who will also be taking the wedding pics. And these are my fave's:


Thanks for sharing in my joy! Have a wonderful day and I'll be back with some more crafting fun tomorrow.

Hazel


Tuesday, March 4, 2014

Over at Craft Storage Ideas with a Sewing Studio Tour

Hi Bloglanders

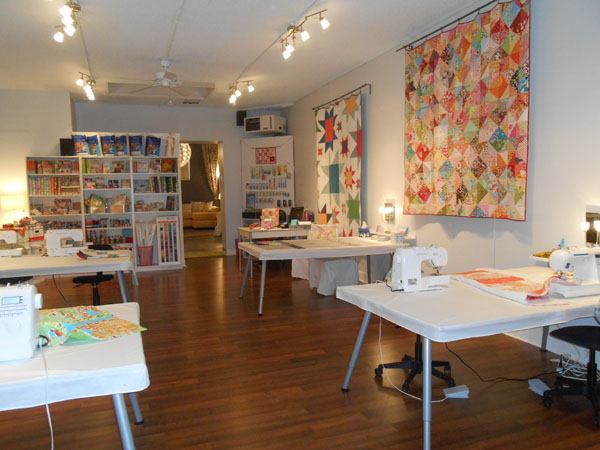
Just a note to let you know that I'm over at Craft Storage Ideas with a studio tour of the West Seattle Fabric Company. I've always dreamed of having a sewing studio where I can teach children to sew and when (NOTE: not if) my dream comes true, it would look exactly like this one:


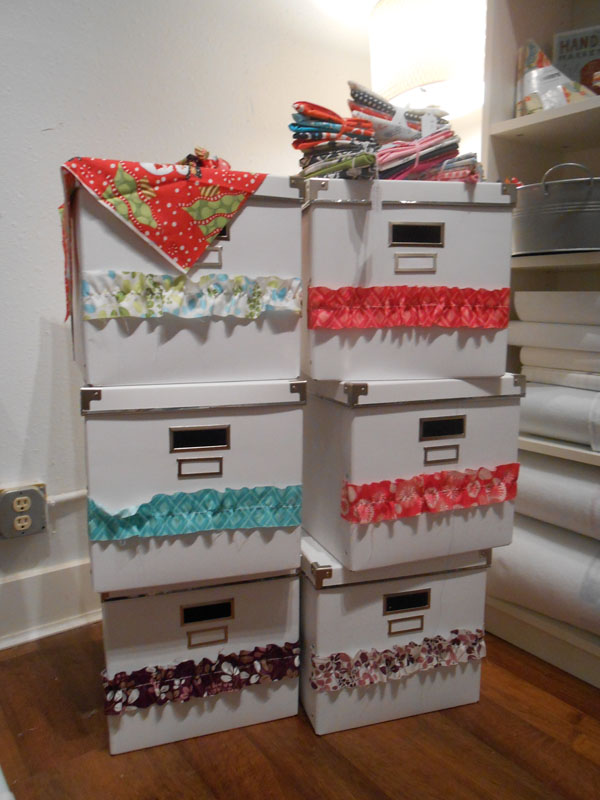
And between lessons, you can store your project in these:


I'm not showing ANYTHING more - please hop over to Craft Storage Ideas to see for yourself.  This room even have a space where you can have a party, sit down, relax and do some hand sewing!  Just click here to be redirected to the Craft Storage Ideas post.

Have fun and please remember to leave some comments.  I love to hear and see what you think and do! Thanks for visiting my blog today. Have a great day and please come back to play as IMPERFECT ME have lots more to share right here on Play as U Go.

Bye
Hazel


Monday, March 3, 2014

Project Life Layout Wedded Bliss

Hello Bloglanders

I hope you had a wonderful weekend. I'm working on a high school farewell dress and loving every minute of it. The only downside it that it's a mess - thread, pattern and fabric pieces everywhere, I even rolled up my sitting room carpet as it's a sisal type of thing and the thread just sticks and sticks and sticks in the grain.

Over the weekend I finished a PL layout and here it is:


It's all about my children and their friends getting married this year. The left pocket is the backside of my art journal page (see below):


If you missed out, just click here to be redirected. I used the backside with the bottom stitching to frame my pictures, stitched a few more frames on my layout, added a hidden pocket for my journaling and a title ex my Silhouette. Here is a close-up of the text and the journaling pocket:

And another project done and dusted.  Thanks for looking at my blog today and please come back to play.
Have a great week. I'm off to work on the farewell dress.

Bye
Hazel