
And as promised .................................. my second tutorial for the week!!. A while ago a friend asked me to teach a Multi Media class and I had to take some pictures for the hand-outs. So, I'm sharing my process with you!!

Make a Multi Media page using only what you have in your stash.
TOOLS TO GRAB:
Watercolor paper, paint brushes, cutting mat,
scissors, ruler, glue, black pen.
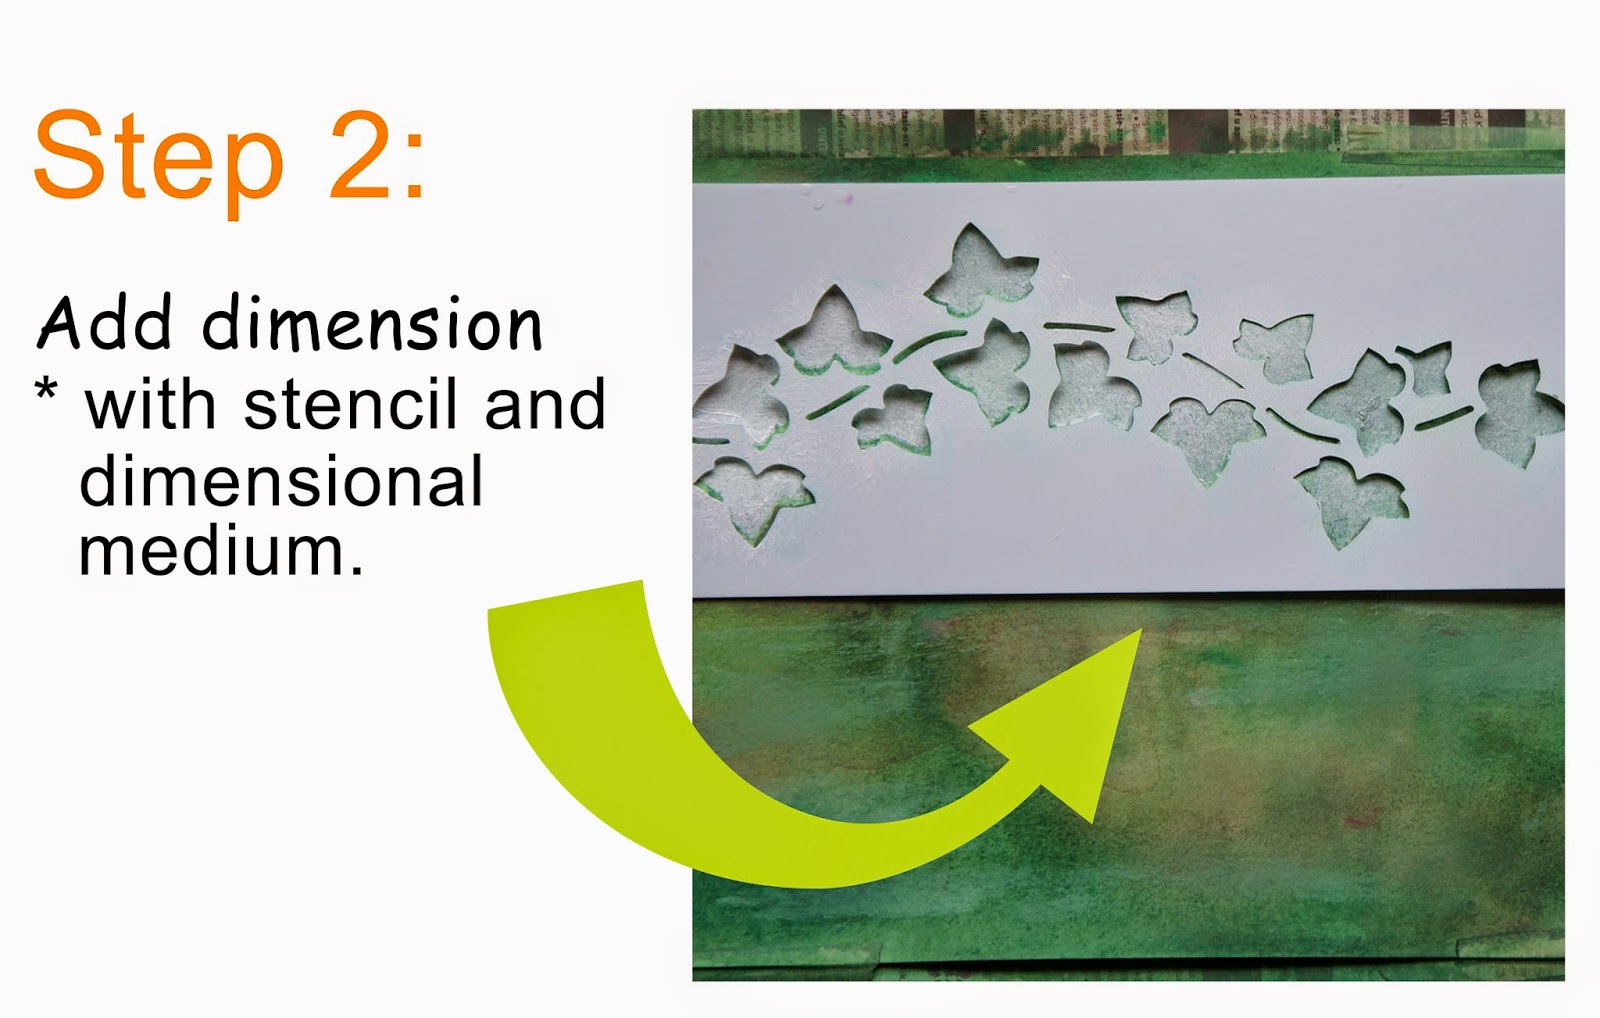
How to:


You see, you can do Multi Media with what you've got!! And here is a list of the goodies I've used from my stash to create this page. If you want more specific info, leave me a comment and I'll gladly supply.
Stamps: Basic Grey (Stitches), Prima (Rondelle, Birds
on Trellis), We R Memory Keepers (rose leaves); Die cut: Cuttlebug with Aquarius mini alphabet die from
Letterpress; Paint: Acrylic paint from Jabtex in blue, yellow, orange,
cream and brown, White acrylic medium; Ink: Ranger (Jet Black), Jenny
Bowlin (Weather Vane); Stencil: from stencils.co.za (Ivy); Mounting paper: Very, very old from Creative Memories; Green and Orange coloring pens (left over from one of the children, don't have a clue which brand it is)
That's it from me. Thanks for looking at my blog and have a WONDERFUL day!

No comments:
Post a Comment