Hello Bloglanders
I'm BACK!!! Most probably I won't be blogging as often as I used to but I'll try to get at least one post up every week. It's not that I don't craft - NO!!! I do. I just got tired of taking pics, "talking" to you and not hearing anything back. It's sort of one dimensional!!
I do plan to go towards videos but first I'll have to figure all that out. If any of you know of "how to" videos, PLEASE leave me links in the comments.
Another thing - I'll be using real scraps in my future scrapping projects. No big deal if something from my stash slips in but I'll be focusing on what I've got - my punches, stamps, wrapping paper, brochures, printing and Silhouette. This all is because I want to have less worldly goodies around me.
OK, let me show you what I've done last week:
First up is my planner page:
I just love this "quote". I got it on Pinterest and then found out that it was done by one of my FAVE's Amy Tangerine. (you can get the link from my Pinterest board here) The whole page evolved around it. The stamped labels are from Kelly Purkey (another FAVE), the diecuts and washi from my stash. Underneath the quote is a bit of wrapping paper.
As I love this planner page so much, I'm submitting it to the SimonSaysStamp Wednesday challenge - ANYTHING GOES. Hop over there to see what the rest of Blogland did.
And a close-up:
And my Project Life Page for week 40 and 41:
Since my son's accident I haven't had a lot of time to spend on my Project Life pages but I still want to capture what we did. So, I'm mostly using Collect cards to keep track. On the bottom right, I've used a picture of my Sweet peas as a filler card. I love pictures more than shop bought stuff so, if you have it, why not use it??
I'm still using my 6x12 alum and on this picture I have 2 weeks side by side. Love all the pictures and the info. On the picture next to the Sweat peas I'm waiting on my son trying on shirts in Woolworth's. He still can't fasten the small buttons so I had to go with to do that for him. A year from now, he would be fully recovered but I'll still have this pic to remind me to be thankful that he survived the accident and has the opportunity to fully recover.
Next up - some sewing:
My mom died less than a year ago and while she was sick a carer looked after her. Mum made me promise to make something for Gerda's baby's christening. SO, "baby" Gerda got his little white christening suit.
I made it from white, raw silk. The blue tartan bow is just to add some "boyishness" to the outfit. While at it I want to wish them well for the christening this coming weekend.
Last but not lease, a 6x12 layout as well as a Project Life page. Both my boys are 28 years old. One of their classmates recently got married. Pieter was the bestman and Wernich the MC. It is very special as today it's 4 months since Wernich's accident. We never in our wildest dreams would have thought that he would be MC at a friend's wedding after spending a whole month in ICU. Here they are - both my boys:
I used Letter Glow to add the background picture (a photo of roses in my garden) and text. Printed. Done. Here you can see the 6x12 Layout on the left and the PL page on the right.
More detail:
That's it!! I'm off to get that video sorted as I'm sure you would have loved to see how all this came together. Watch this space and all will be revealed.
Thanks for looking at my blog. Have a wonderful day and a thankful November.
Showing posts with label Planner. Show all posts
Showing posts with label Planner. Show all posts
Tuesday, November 1, 2016
Monday, February 8, 2016
Planner Page February 2016
Happy Monday Bloglanders
I hope you are having a BLAST!! It's very hot down under in Sunny SA and we spend most of our time at the pool, having a "braai" or camping. SO, my Traveller's Notebook is filling up FAST. I'm also planning day (and night) in order to have as much free time as possible.
Let's look at another page from my Planner.
I've used paper pieces which I received as a freebie with a scrapbook order. This is what I got:
I'll be trying to use it to do a Planner page, a Traveller's Journal page, a page for my Notebook and a Project Life spread. Think I will manage??? Let's give it a go.
Here you can see the right side:
I LOVE the stamps that I've used! If you want to know where I got them, I'll look it up but I'm totally too lazy to do it today!! On the left it looks like this:
Washi from my stash, the heart stamp is from Gorjuss and part of a set that I've never used - more suitable for cards and as you know - no elaborate cards for me. I'm glad that at least some part of the set fits in with my scrapping style.
Planner Page, done, dusted and next project ready to go.
I also made this "lekker by die see" digital stamp. YES. It's Afrikaans and I'll be sharing my artwork and inside info in my next Blogpost. Just check back and all will be revealed. Here it is:
Like it? Just come back to play.
I'm off - things to do, people to meet and places to go. Have a wonderful week.
Wednesday, December 16, 2015
December Daily - A Late Start
Hello Bloglanders
I hope you are enjoying the holidays!! My mum passed away last week. Thanks to everyone who sent me emails. It has been a LONG year for all of us. She has been sick for nearly 2 years and as we took turns sitting with her, it made our weeks a LOT shorter. I did craft - at home and while sitting with her BUT just didn't get the time to take pictures and blog about it.
It means that I have LOTS of "old" projects to photograph and share with you right here @ Play as U GO. But, let's start with a new one - my 2015 December Daily.
I actually decided to skip the DD this year but as the month included so many big events, I reconsidered and decided to join in the fun. I got this free planner from this site, made a few tweaks to translate it into Afrikaans and printed it A5 size. Into my journal, a few supplies and ready to GO.
This year I'm limiting myself to these supplies:
2 sheets of Silhouette print and cuts , my Planner Pens, colouring pencils. a label sheet from my local dollar store (Crazy store for my fellow South Africans) and a few stamps.
I did start off a bit late and had to use my iPhone Collect App to get up to date. I have included a monthly Collect print-out in my PL spreads as well - will show one in another post. Great keeping track of events and pictures and also a good way to keep busy while standing in queues at the supermarket / keeping the sick company.
Have you tried it?? LOVE, LOVE, LOVE. I first met "Collect" over @ Amy Tangerine's. Read all about it here in her post. Even if you don't want to try out Collect - hop over there and see the GORGEOUS Jack - I just love that little boy.
And a few close-ups:
We normally travel a lot over the December holidays therefore I've added the little red cars to mark our trips. It's like a mini travel journal all in one glance.
I'm so glad I did it!! I'm sure that I would want to remember December 2015 in years to come. Normally we do a lot of fun things, have a lot of occasions to celebrate and do "summery" stuff but I think this year would be EXTRAORDINARY for all of us - forever!!
Thanks for looking at my blog today. I'll be posting my next DD page tomorrow and share a bit of my plans for 2015. Let me give you a hint - I'm converting my PL to 12x6 next year. Check back and all will be revealed.
Have a GREAT day.
PS. It seems that the Blogger devil re-arranged some of my I's - I will try to fix it. Please bear with me!!
Tuesday, November 17, 2015
Getting Inspired
Hello Bloglanders
I'm still on my quest to get inspired??? Have you tried The Creative Life Documented?? Well, I am and it's working. My workspace is cluttered which means - I've been inspired!!
Let me show you the next project I did with the 3 colours of wrapping paper picked up from my local supermarket:
A lot of pictures, a few torn strips of wrapping paper and embellishments from my stash. As easy as that and it took me a few minuted to complete. I love the "Springy" feel of the whole layout!
AND, a page for my planner:
This week we are "making time" over at The Creative Life Documented. I had a GOOD think about this and worked out a lot of short cuts that I'll be taking in future. Check back and I'll tell you more in my next post. In the meantime, I'll share my first step towards having more time to be creative:
In this layout I used ONLY photos and even took a picture of the logo of the place where we've been to use as a tile for my page. I also added the date to one of the pictures - no need for labels / stamping. All done while we were camping - only printing and it's in my album for my family and future generations to see and enjoy!!
That's it!! I'm off to "make some time"!! I'll be back later this week with two more of my projects. Have FUN and remember to TRY SOMETHING NEW - TODAY!!
Sunday, August 16, 2015
Caravan Party Favors
Happy Sunday Bloglanders
I hope you had a wonderful weekend!! Today I'm back with "my take" on PaperCrafter'sCorner Magazine Monday Week 112. - 3D Caravan Party Favors for my Camping Friends:
And my inspiration?
I hope you had a wonderful weekend!! Today I'm back with "my take" on PaperCrafter'sCorner Magazine Monday Week 112. - 3D Caravan Party Favors for my Camping Friends:
And my inspiration?
Remember, it's winter down under in Sunny SA!!! I just couldn't get myself to the ice cream truck but camping always lifts my spirit SO - I decided to do a caravan in ice cream colours. It's 3D and I used the little camping caravan box as party favours for my camping buddies.
Inside is a tea cloth. Wherever you are out of doors, there are bugs. Something clean and white to keep them off your food. I've been planning this project for YEARS and just got around to it this week thanks to Magazine Monday's Challenge.
I've used this die cut before but can't remember if I've shared it before. Doesn't matter - I've got it on file and proud to show you again. This one was a 3D interactive birthday card for a Camper friend.
Left pic shows the pink note card, a green mini envelope and the 3D box. Middle is a view from the top showing all the envelopes and cards. Right: Ready for delivery.
Our friend needed new cutlery for her caravan. We decided to gift her with money but didn't want to make it a competition of how much each of us could afford. Therefore, each of us used an envelope for our money and a separate card for the birthday wishes. It all fitted into the caravan box. I just added a flag with our friend's name to make it even more festive.
And some of the die cut caravans even hopped onto my Planner:
I just love to add leftovers to my Planner. The dear head is the negative of one I've used on a Project Life Page. I just filled the negative space with black cardstock, used some washi to cover my scribbles and it was done.
And another peek at my Caravan Party Favors:
Now I just have to wait for our next camping trip to hand out my Favors. In the meantime I'll be crafting my week away - just come back to play and all will be revealed or follow me on Instagram to see it sooner.
Thanks for looking at my blog today. Have a happy week and remember to try something new - TODAY!!
Monday, March 23, 2015
Craft Storage Ideas Planner Blog Hop
Hello to all my regular Blogland readers as well as my special guests today – the ones visiting for the Craft Storage Ideas Planner Blog Hop. Thanks for Hopping along. You should have come from Amanda Corbet’sblog.
We are so excited to share some great ideas for keeping your
planner both organized and fun along the way. But first, I want to share some
FANTASTIC PRIZES we will be sharing with lucky commenters along the route!
·
TWO winners will receive 50$ Gift Certificates
from OrganizeMore to pick out your
fave organizer!
·
One winner will receive a collection of planner
stickers from MareBear
Crafts on etsy!
To win, simply comment at each stop along the way. You do not have to comment on every stop to win, but it sure increases your chances! Also, we are sorry, but winners must live in the United States, as international shipping is just too pricey.
And now for my Planner Story. Get some coffee and away we hop!!
I’m not new to Planner Planet – I’ve been keeping a planner while at school, university, raising the boys (in those days we called them diaries!) and even now I can't live without it.
I note “to do’s”, events, menus, interesting facts, things
that happened, quotes, inspiration and motivation.. My planners are like mini
scrapbook journals and I can report back on things that happened 20+ years ago.
Here you can see my Planner stash from the past 5 years.
Mostly my pages are representative of what is currently on my
craft desk / happening in my life and once the year is over, I file my
pages away in a handmade, creative cover and a brand new year goes into the
Planner cover.
Enough of my planner as I came here today to show you how I
keep my planner goodies on hand. Let me
show you the outside of my planner goodie file:
It’s a very, very old A5 file that I covered with hand dyed
scraps left from this project. On the front I have “GENIET” (= ENJOY in
English) – that’s my little word for the year and I like to remind myself not
to take life so seriously.
Let’s start with my inside cover pages. The front has pens, highlighters,a ruler and a paint brush. The back has a slot for a notebook and inside the front and back covers, I stash some journaling cards, watercolor paper and additional notes and stickers.
STICKERS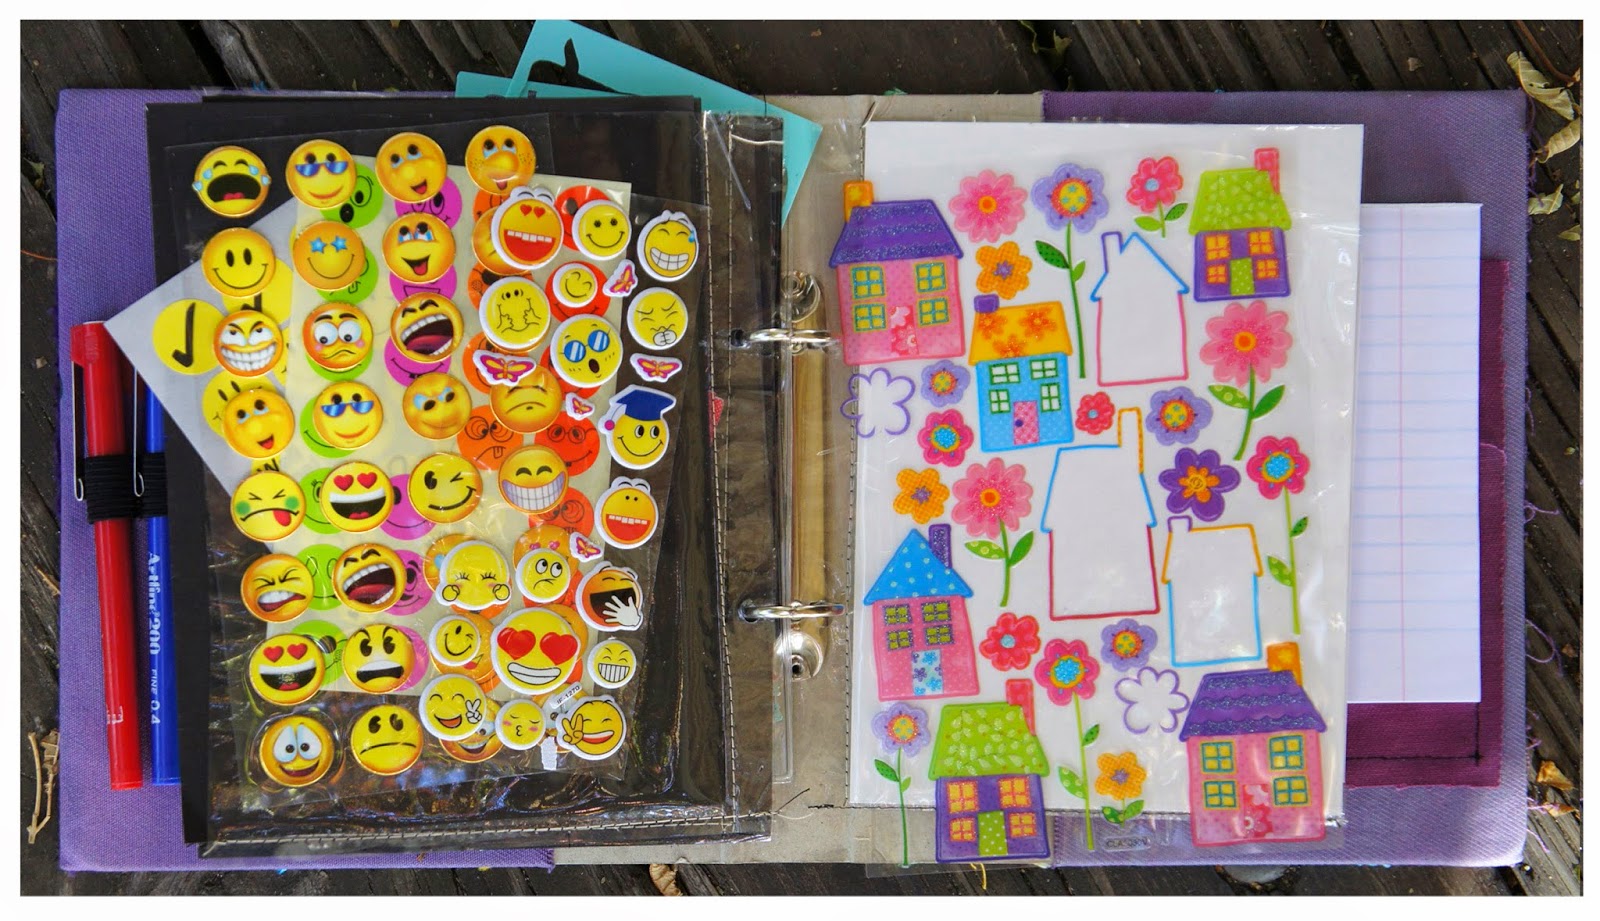
Just bits and bobs from my stash that I love to have on
hand. I made the “page protectors” by stitching book cover plastic onto cardstock
and punching holes for the binder rings. I’ll put up a post next week to show
you exactly “how” to.
DIE CUTS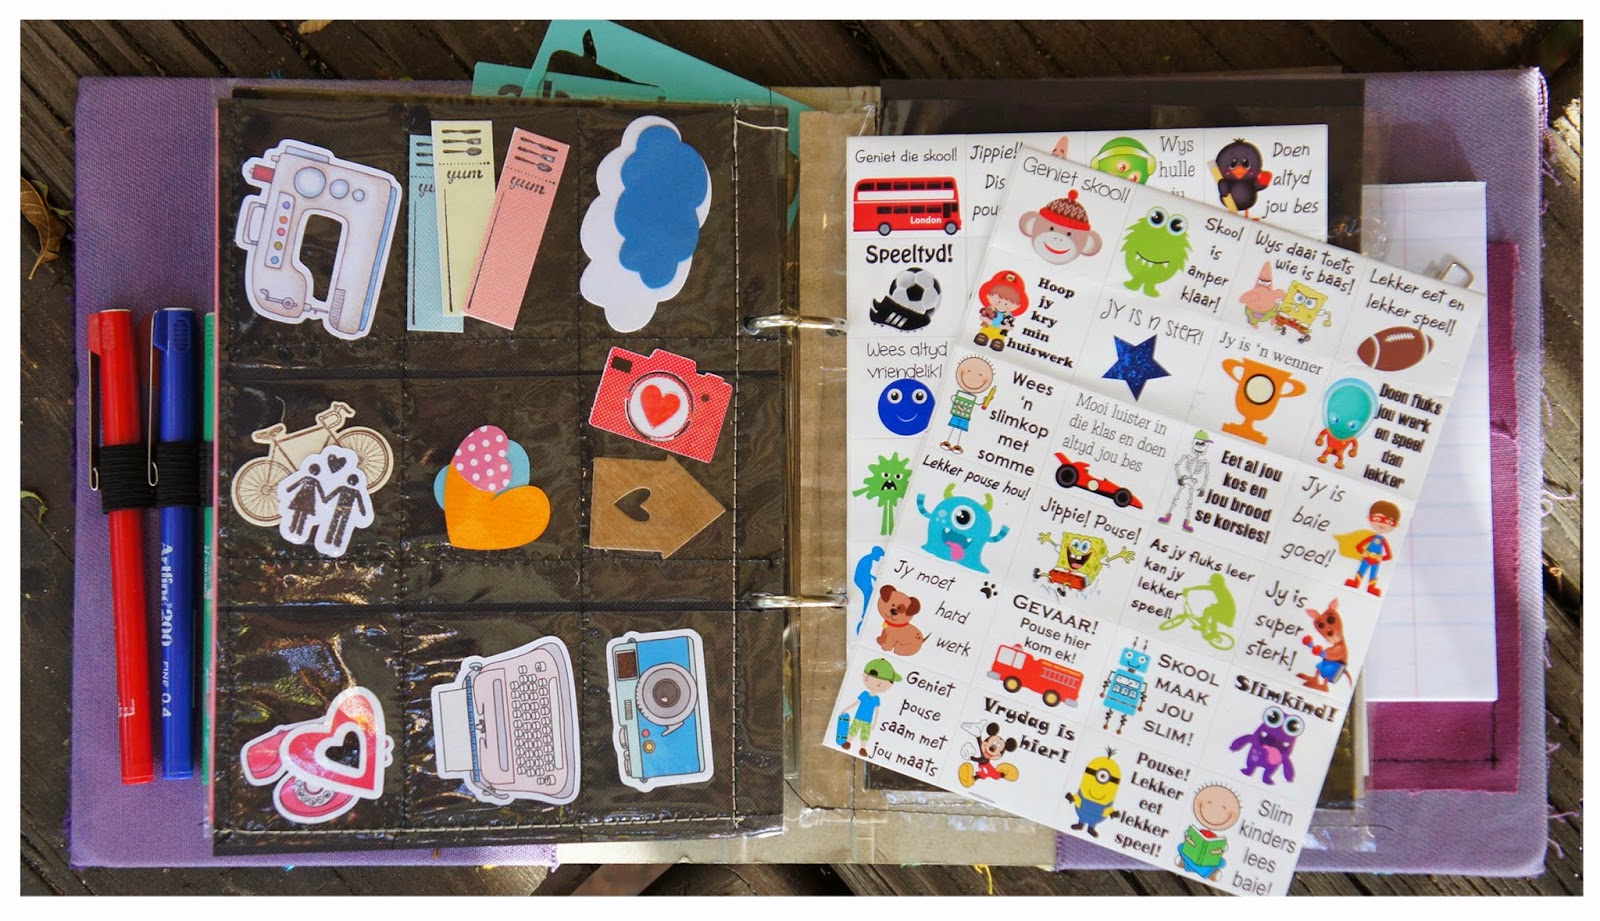
Mostly leftovers from my craft desk.
PAPERCLIPS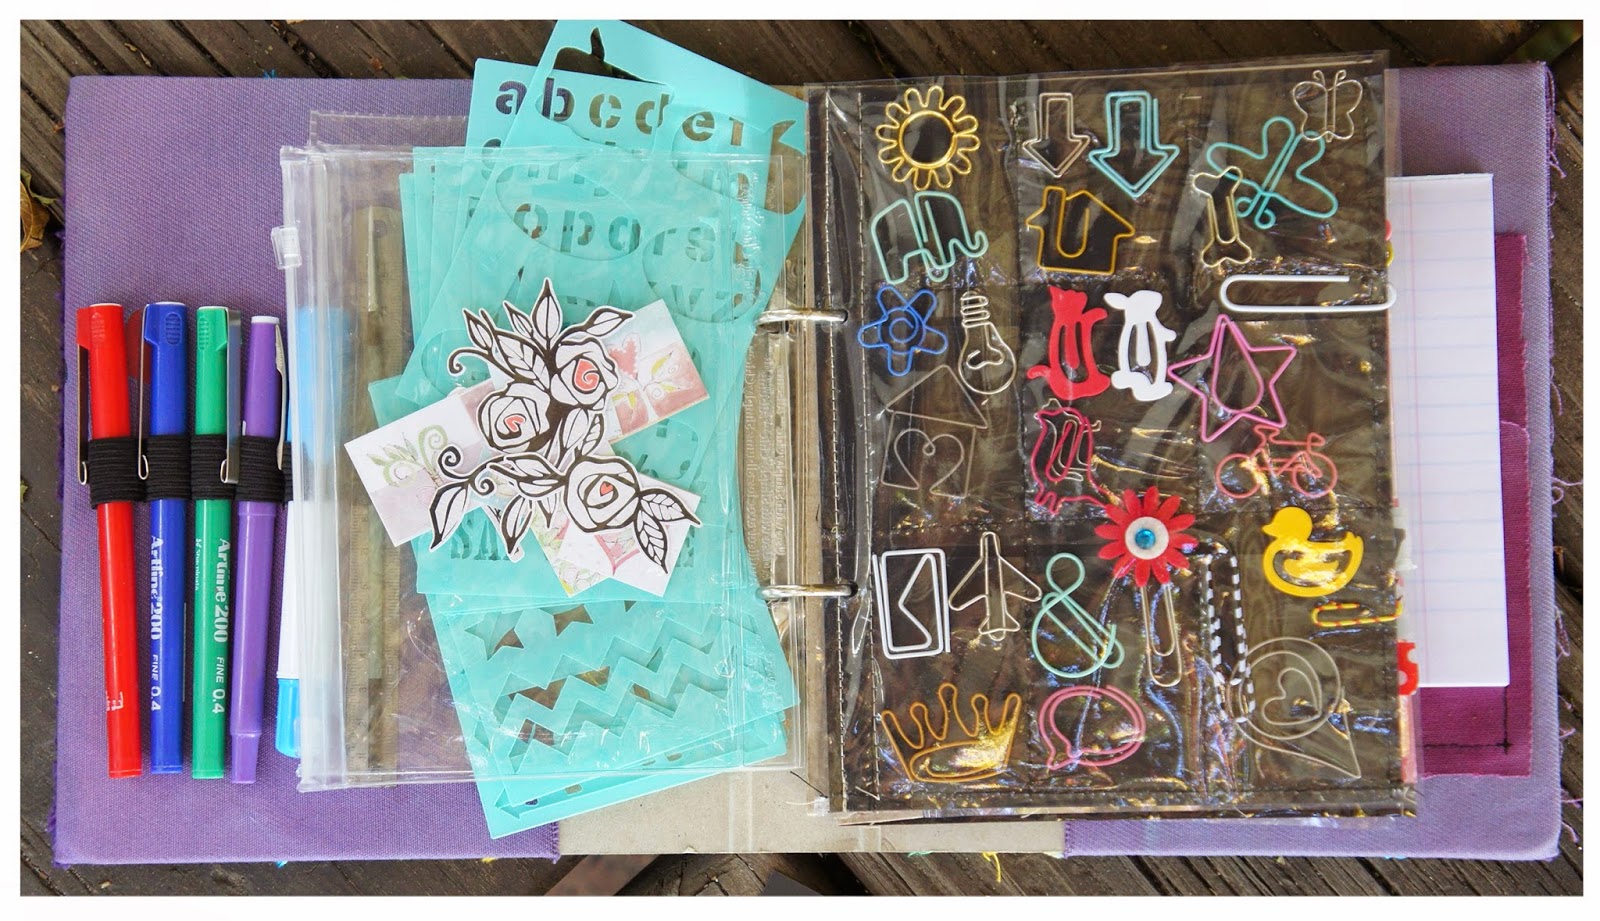
Once again, a handmade “page protector” filled with
paperclips from my stash. I love to use them in my planner, on "emergency cards" and in my Planner file.
STAMPS
I have only one set of planner stamps and an alpha set in my Planner File. I do love the little wooden
alpha set that I bought locally and use them A LOT as I despise my own handwriting! They are kept in a small plastic zipper bag that I recycled from
somewhere. The original alpha set came in a little wooden box but I opted for a gift card tin as it's much slimmer and fits into the zipper bag with the planner stamp set.
STICKY NOTES 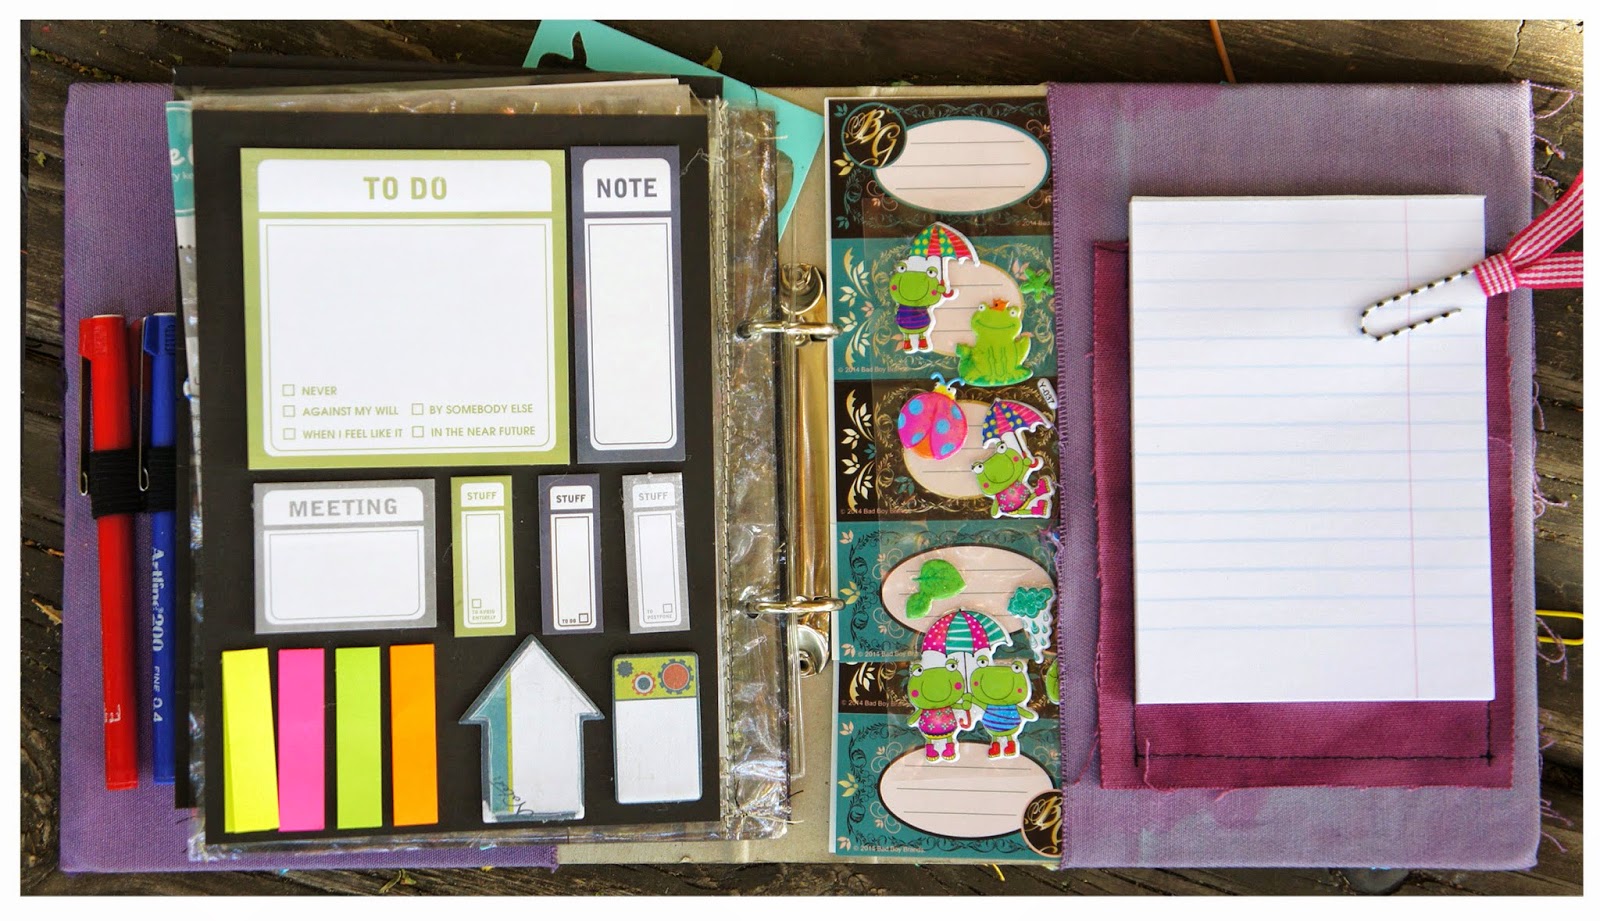
I gathered them from all over – the office, my craft stash
and even swopped some with family and friends. Only 20 pages of each variant go
into the file - the rest stays where they are. If you add more, the file becomes too
bulky.
WASHI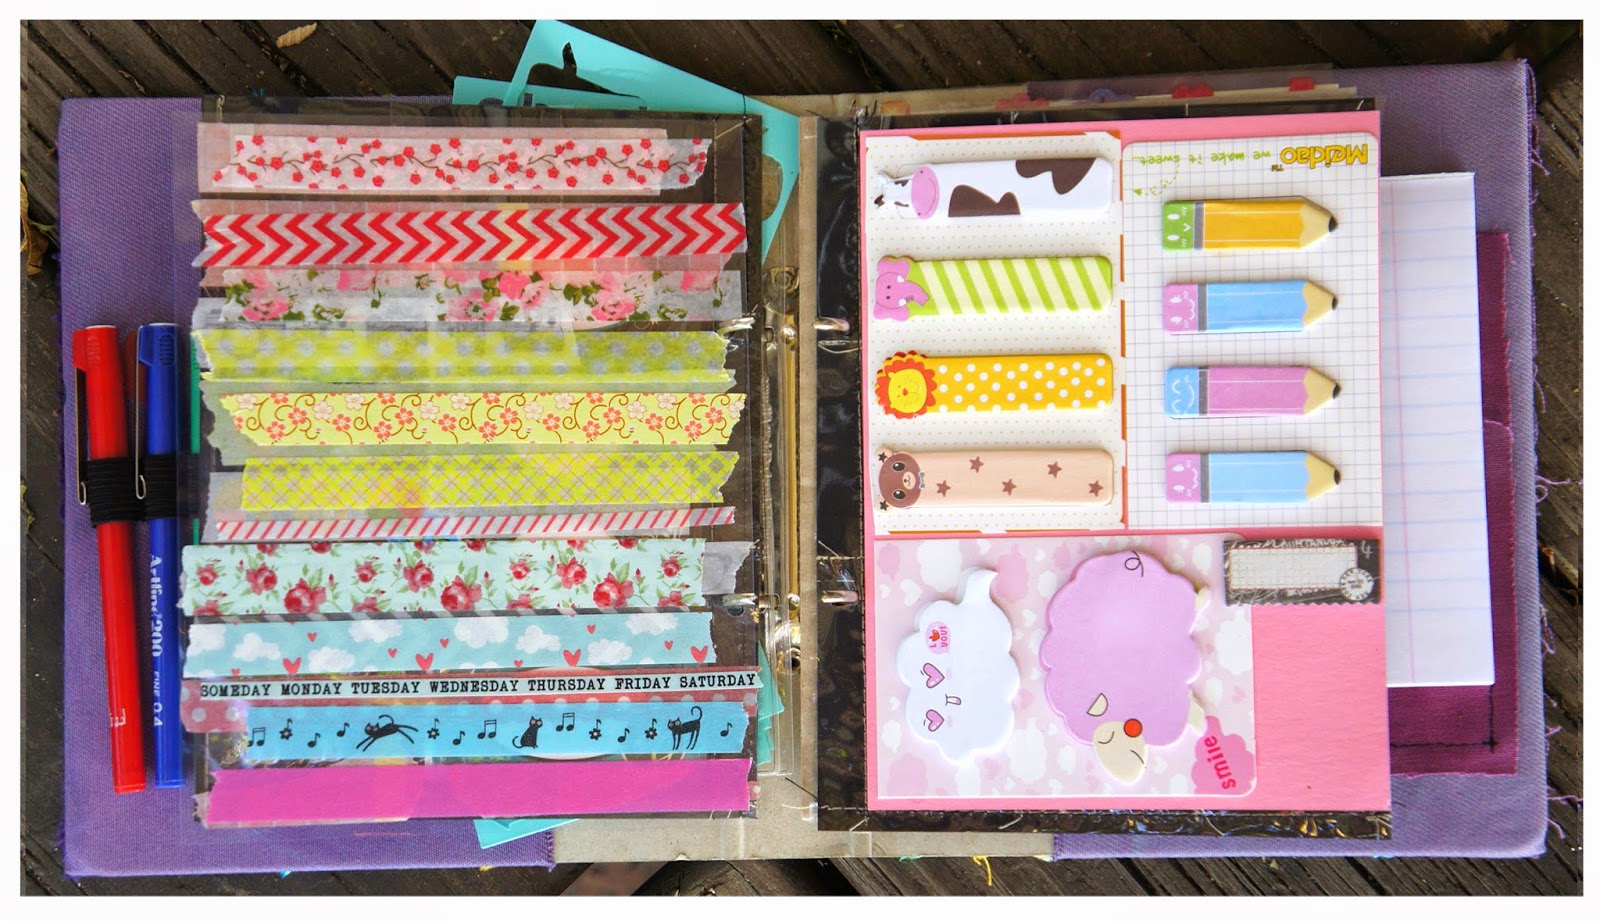
I love to use Washi and what better way to make “flip-up’s”/
reinforce binder holes / divide pages?? I have an A5 acetate sheet and I just
add strips of washi to it. Easy Peasy!!
STENCILS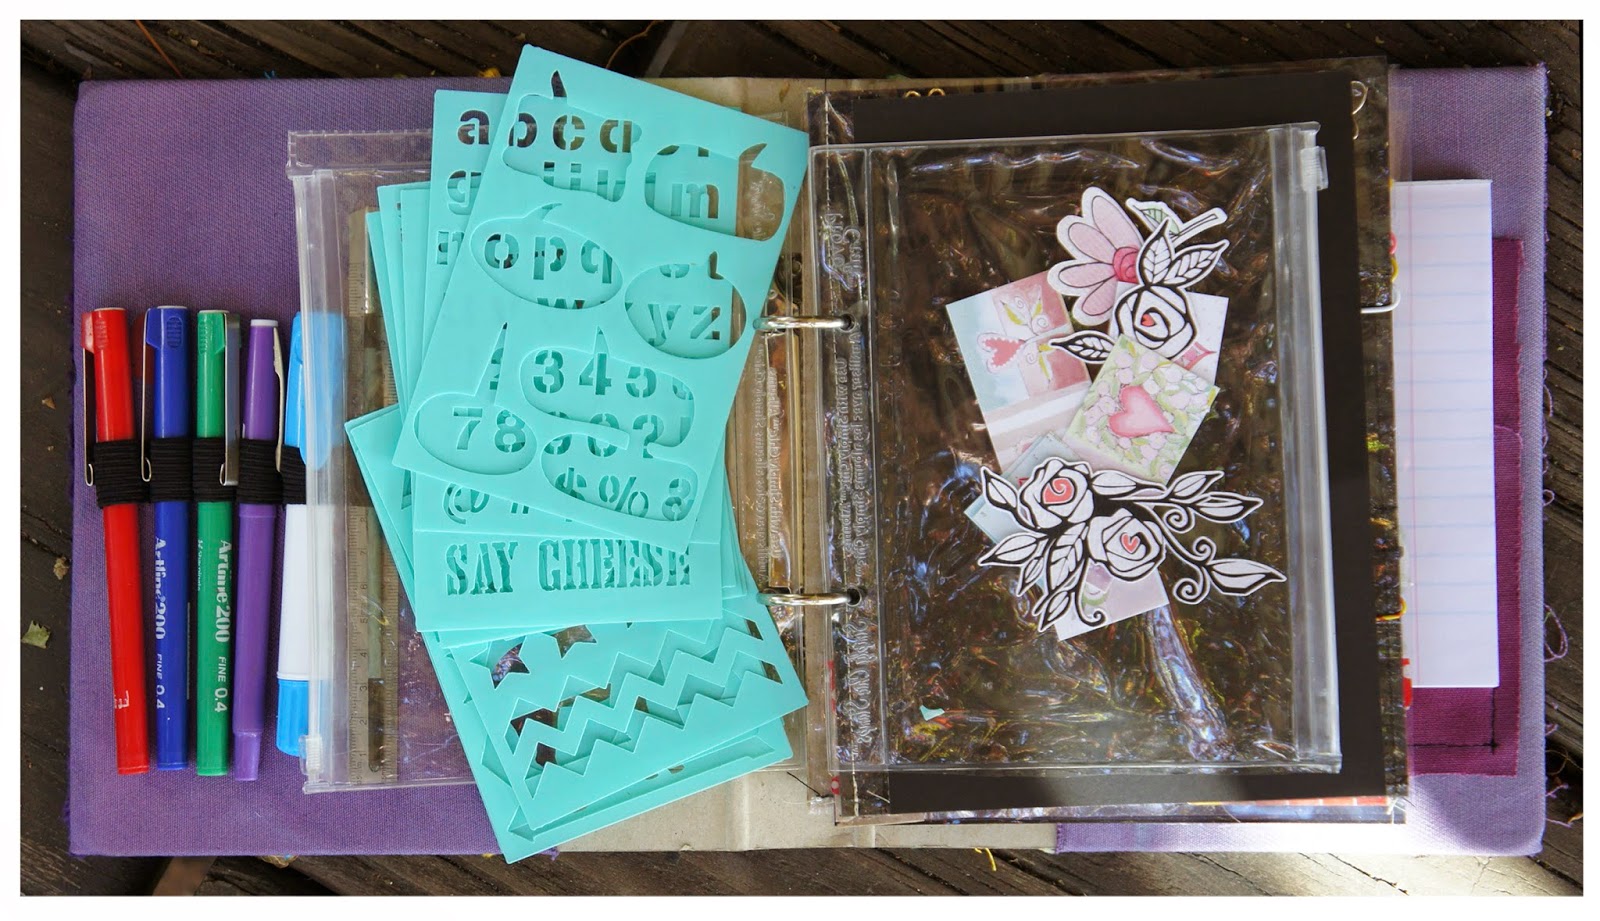
A mini stencil set in another of the recycled plastic zipper bags.
STATIONARY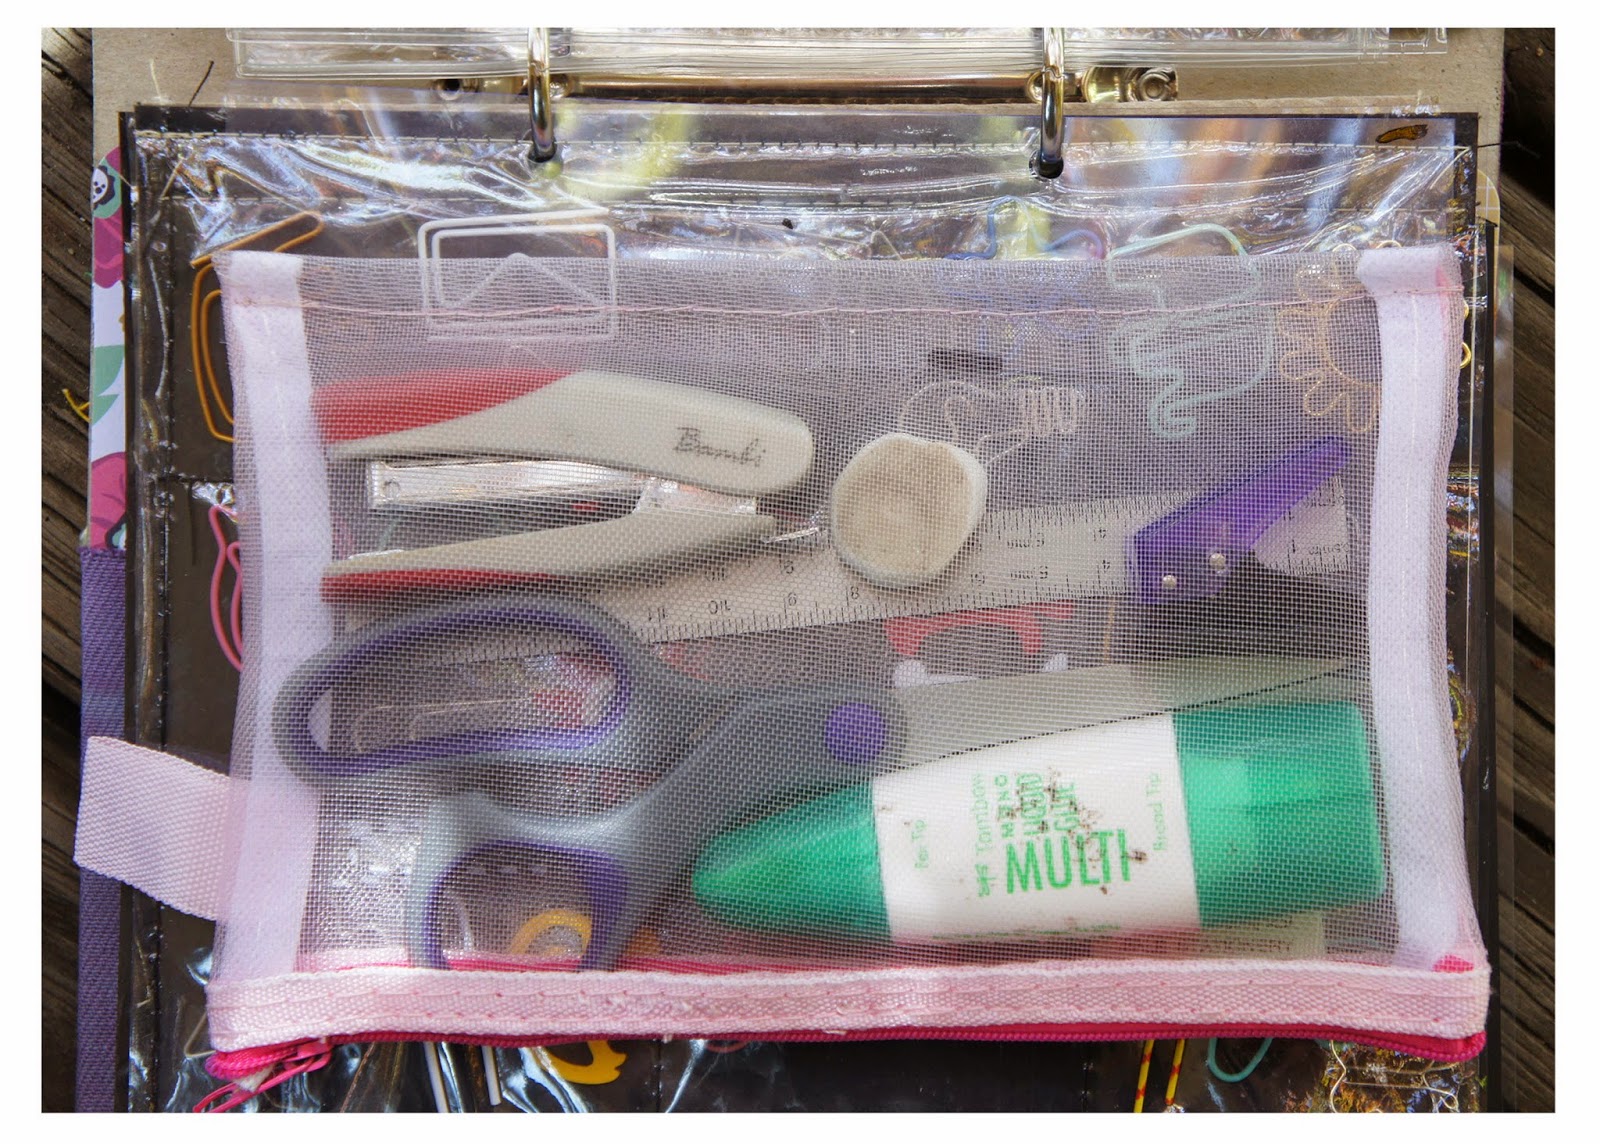
Wherever I go, my planner and Planner File goes and so does
some stationary. I’ve sewn a spine onto a fabric pencil case and it goes into the
file with the rest of my Planner goodies. In here are scissors, glue, a ruler,
a hole punch (from a Christmas cracker!) and a small stapler. I have a
similar bag for paint goodies. What
better than to paint / draw / write a bit when you have time on hand? Sorry, I forgot to take a picture of it!!
That’s it – my Planner File for keeping everything that I
need and use together, neat and out of the way while at home / traveling. If
you have other systems for storing your planner goodies, let me know
in the comments and one of you could win a digital set of planner stickers by AlexScissorhands.
As this is a Digital File, my freebie is available to everyone. YES, even you down under are welcome to enter!!
You are welcome to play along on Instagram. Just tag your Planner Pics with #plannerplanet and your storage ideas and solutions with #craftstorageideasblog. We would love to see and hear what you do!!
Thanks
so much for stopping by! Have fun, get Planning and remember to try something new. Next on the Hop is Jessica Frost-Ballas’s blog.
Sunday, February 1, 2015
Sunday Summary Week 1-5
Hello Bloglanders
Can you believe it's the 1st of February and week 6 already??? I couldn't believe my eyes when I marked down the weeks for my January PL. As I'm already behind schedule, I decided to do week 1-5 in one go.
When I made my New Year's resolutions, I decided to make a weekly checklist. I've printed a few. Every Sunday I make a list on the back of my card of what I want to achieve that week and when the week's done, I write the actual on the front.
Then, when I do my Sunday Summary, I can just add pictures. And this is what I did this week:
I tried a few recipes:
A roasted Halloumi salad, Hertzog cookies and fried onion rings. I used the same batter for my onion rings that I normally do for my Sweet and Sour chicken. Get my recipe here. I feel like a Masterchef!!
And I did some sewing:
4 Tops and pants sets for my mum. Here you can see my sewing scrapbook with the patterns and fabrics used:
And on my craft table:
I worked on a post for Craft Storage Ideas - we are having a Bloghop in March and I'm rather proud of my project. Keep watching back and all will be revealed.
Finally, my December Daily Album is finished:
I will do a separate post later this week - I love how it turned out!! The die cuts, printables and idea came from Wilna Furstenberg's Heartfelt Christmas Workshop.
And I sorted my European trip memorabilia. I can't help it - I collect bits and bobs as I go but this time round, I decided to take a pic of what I have, give away what I'm not going to use and do a PL spread with what's left.
My favorite was the Van Gogh museum in Amsterdam. You can see the admission tickets on the first picture, bottom right. I also bought the most beautiful sunflower paper clips there. It is in a little tin just above the tickets.
Over the weekend I've sorted all the holiday pictures and I'll start on my PL pages next weekend if we don't go camping. Talking about that - we swopped our off road trailer for a caravan. Her name is "MOTLAPPER". Sorry, it's Afrikaans but I'll try to explain. When Pieter was small he didn't know the difference between a moth and a butterfly so he came up with a combination of both the words MOT (=MOTH) + LAPPER (a butterfly is a "skoenlapper" in Afrikaans). I suppose if you do the same in english, it would be a MOTHFLY.
So I made some summery, camping, MOTLAPPER stickers for my Personal Planner:
I used the "print and cut" function and some white sticker paper from Silhouette. It worked like a charm - I'll be making some more ....................................... so easy. You will see them again when I share some of my Planner pages.
That's it. I'm off to get some rest. It's a new month and the office is VERY busy. Tomorrow I'll have to be in front of my computer all day long getting our admin done. In the meantime, have a GREAT week and check back as I'll show my beautiful DD on Tuesday. Of course, I'll share the inside info right here on Play as U Go!
Thanks for looking at my blog today and remember to try something new - TODAY!
Subscribe to:
Posts (Atom)


.jpg)


